Stout: Tasting Iterations 3 & 4

This post is one in a series following six brewers collaborating to each make a small adjustment to a single recipe in order to improve it, then pass it along to the next brewer. We hope to learn more about the art of recipe creation as we see how other brewers approach the same recipe. The rest of the comparison tastings for this series can be found here.


The recipes for the beers being compared below are as follows:

Iteration 3 Iteration 4
Base Malt 80% 2-row 72.5% 2-row
Specialty Malt 1 5% Victory 10.8% Victory
Specialty Malt 2 10% Roasted Barley 4.4% Roasted Barley
Specialty Malt 3 5 % Chocolate Malt 4.4% Chocolate Malt
Specialty Malt 4 None 7.8% Flaked Barley
60 min. hop Nugget: 47.7 IBUs Nugget: 41.2 IBUs
5 min. hop Willamette: 2.9 IBUs Willamette: 3 IBUs
Yeast US-05 US-05
OG 1.045 1.065
FG 1.005 10.20
ABV 5.25% 5.9%

Taster: M. Willis

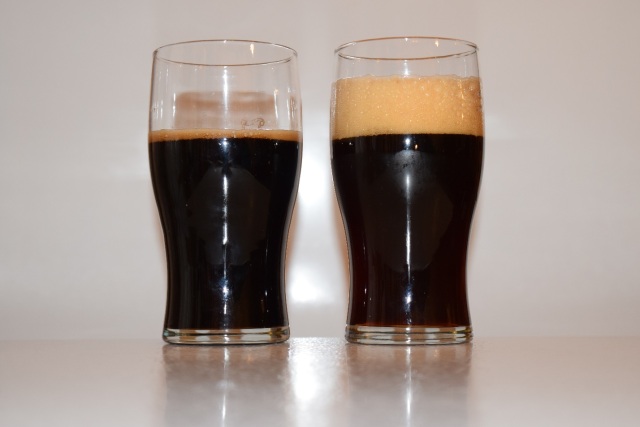
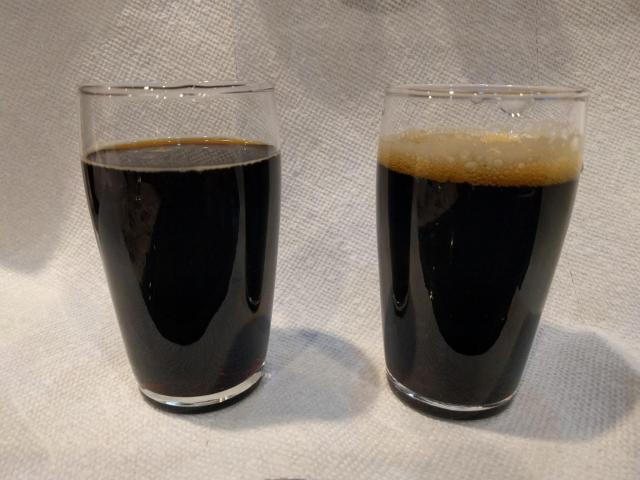
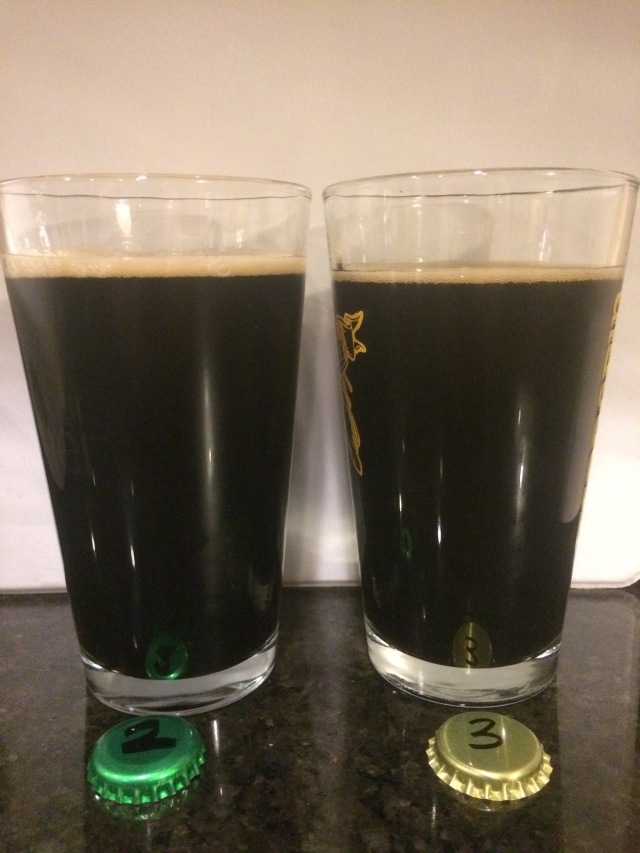
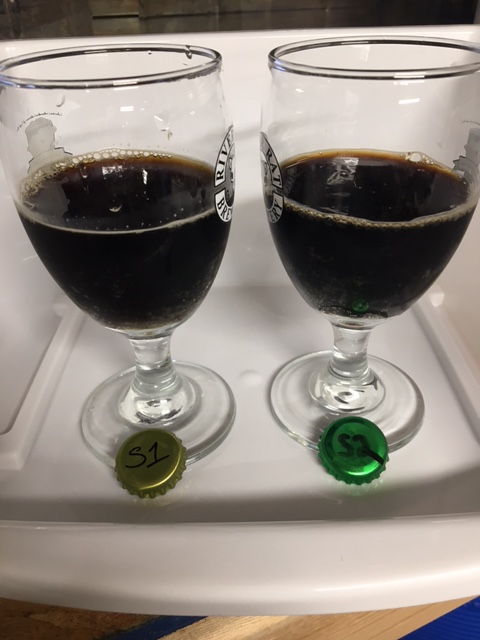
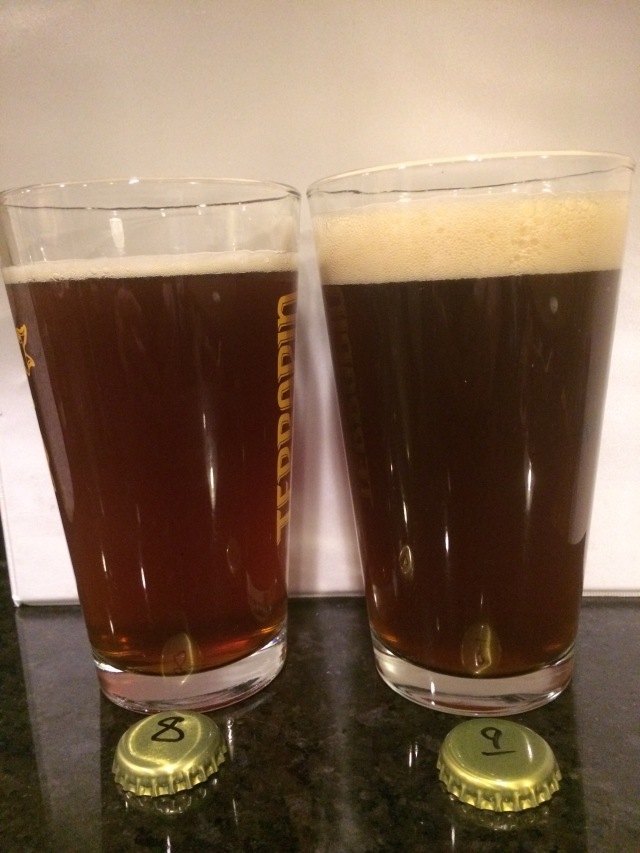
Iteration 3 has an attractive medium-brown color to the head. The head is somewhat short-lived but leaves nice lacing on the glass. The head fades to cover about half the beer. Iteration 4 had a longer lasting, lighter brown, THICK head. The pronounced cap of head sits like a blanket on this beer and leaves beautiful lacing in this iteration. Iteration 3 is inky black in color, while Iteration 4 is lighter, but still a medium-dark brown color.

3&4

Left: Iteration 3; Right: Iteration 4

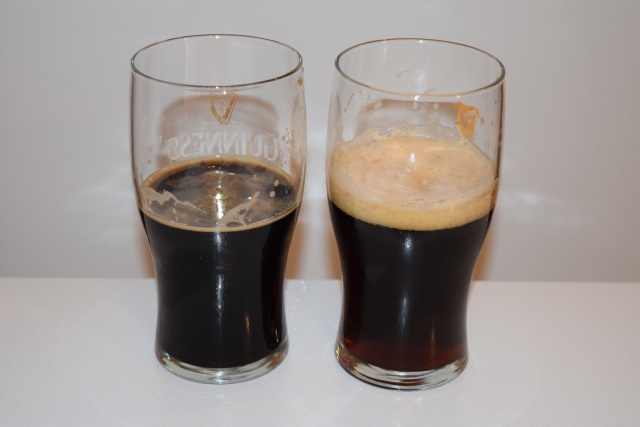
It’s been 40 days since I first sampled Iteration 3. Time has been good to it as it has pleasant coffee and dark cherry notes in the aroma. The chocolate noticed during the original tasting has fallen to the wayside though. Speaking of changes since that first sample, what happened to the umami/soy sauce? It peaks its head out once warm, but it’s nowhere near as sharp as before. Iteration 4 sees chocolate rejoin the coffee and dark cherry—at least while young. Will it fade like Iteration 3? I’m mostly hoping the dark cherry notes further increase with time. I’ll be putting some of these away to see.

3&4 drank

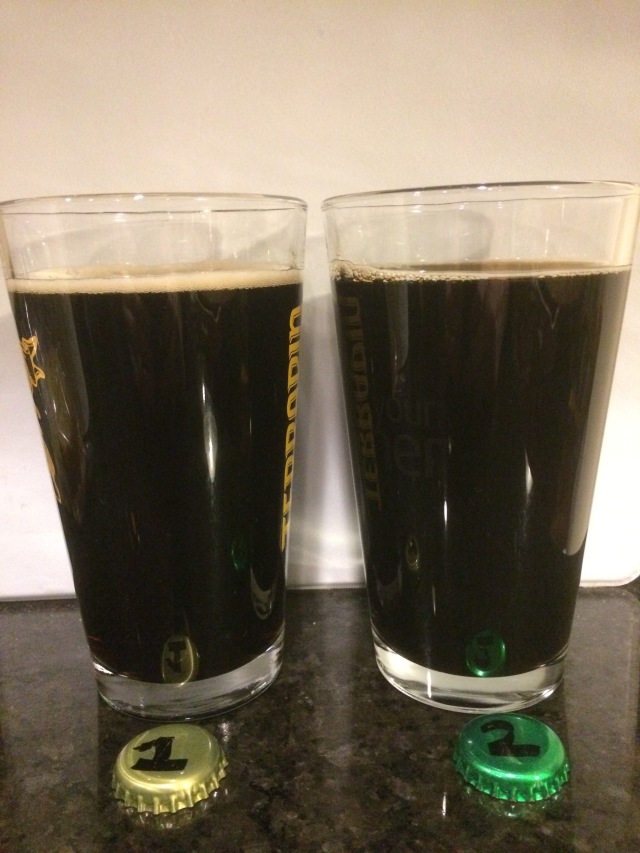
Left: Iteration 3; Right: Iteration 4

Flavor follows the nose in both beers. The coffee and dark cherry stand out in both Iteration 3 and 4. The bittersweet chocolate in 3 has diminished since the first tasting and it is only just there in 4 as well. Again the hops are subdued or too complimentary to be noticed. There’s a clear malt sweetness in Iteration 4 that’s only noticeable in a warm Iteration 3. Like most stouts, both of these beers turn the volume up in malt flavor and sweetness as they warm. Iteration 3 has that umami/soy sauce flavor once quite warm. It no longer lingers on, nor is it present when cold.

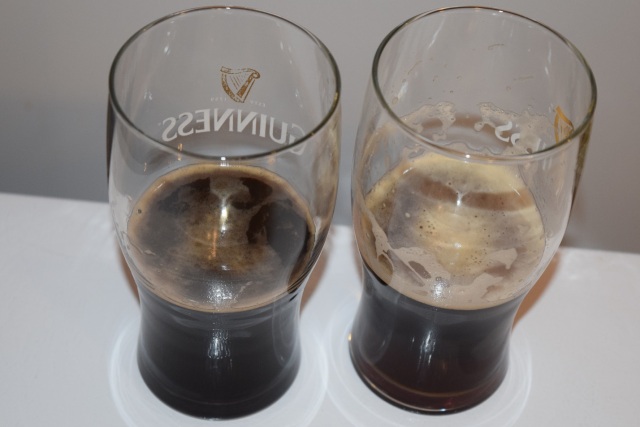
Mouthfeel on Iteration 3 hasn’t changed much since the original tasting: it’s light bodied. Time didn’t fix that, but the black tea astringency has decreased a bit. Iteration 4 is creamy with all that flaked barley. That stickiness that laces the glass and blankets the beer also coats your tongue.

3&4 lacing

Left: Iteration 3; Right: Iteration 4

The biggest differences to me were the mouthfeel and color of the beers. I do like the improvement from the flaked barley. I am a proponent of flaked grains and was happy to see it made such an impact. Beersmith warned me the color would be out of range for a stout, but I pushed forward wanting to dial the roast grain flavor way down. I think the only thing lost from the previous iteration that made a strong impact on the overall quality of the recipe was the color. When side by side, Iteration 3 is more visually appealing. Some improvement was made, but there is definitely room for more. Balance is the most important component of a recipe. I wish you could just buy it.

Taster: C. McKenzie

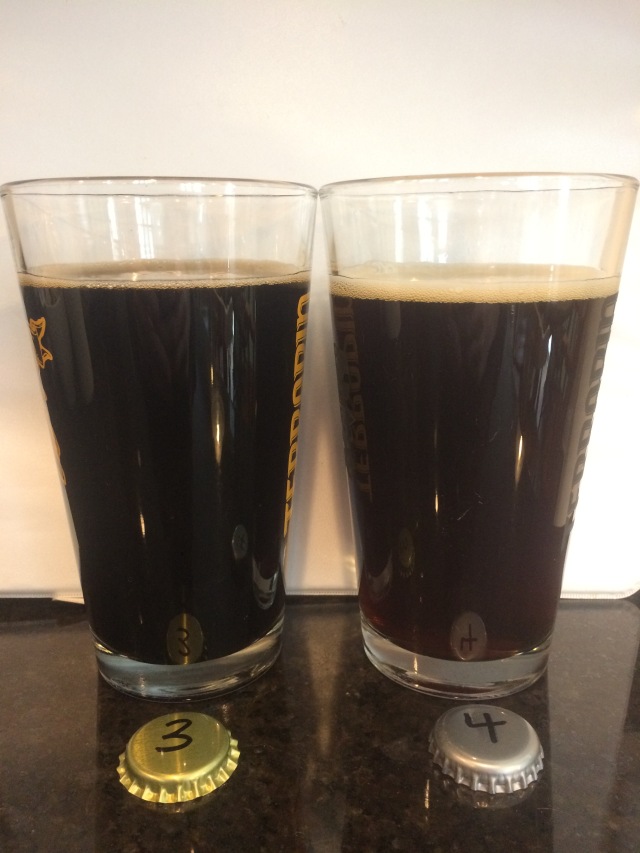
Iteration 3 was black in appearance, with a moderate, tan head that had minimal retention. Iteration 4 was dark brown in color with a definite red tint to it when held up to the light. This beer poured with a moderate, white head that had good retention.

3&4--me

Iteration 3 smelled roasty and had notes of coffee and dark chocolate in the nose. Iteration 4 had less aroma overall, but definitely began to open up as it warmed. This beer had hints of a lightly roasted coffee (though without that acidic scent particular to many lightly roasted coffees), roasted notes, toast, and perhaps a touch of cinnamon—perhaps.

The flavor of Iteration 3 was one of dark chocolate, toast, and coffee that has sat on the burner for several hours. Iteration 4 had a hint of coffee, semisweet chocolate, and a slight roasted flavor. The flavors of this beer meld well together and come together in such a way that they provide a very smooth beer that is not at all biting as some stouts can be.

Posted in Comparing, Stout | Comments Off on Stout: Tasting Iterations 3 & 4

Stout: Iteration 4

This post is one in a series following six brewers collaborating to each make a small adjustment to a single recipe in order to improve it, then pass it along to the next brewer. We hope to learn more about the art of recipe creation as we see how other brewers approach the same recipe. The rest of the series can be found here.


Author: M. Willis

Brew Day

My brew day starts a few days before I actually brew when I finalize the recipe in Beersmith, decide on my water adjustments via Bru’n Water, and then acquire the ingredients from the local homebrew store. My LHBS has been such a big part of my happiness as a brewer. The owners are super fun, very knowledgeable, and a huge part of our local brew club. Everyone deserves a great LHBS. It makes the hobby way more fun!

My equipment is atypical. I do not use either a 3-vessel system or Brew in a Bag (BIAB). I use the less common Mash in a Bag (MIAB) method, using a 10-gallon cooler—the reason being, most of the time I batch sparge because I find it more repeatable and there’s something comforting about stable mash temps. I then boil in a 15-gallon kettle. I’ve been using this equipment and methods for several years, so this brew day was entirely without surprise. How very Zen.

I collect and treat my local water with Campden tablets the night before I brew. We are lucky to have access to the water company’s current test results via their website, so I’m fortunate to have enough info for adding my water salts. I have a puppy who is learning about homebrewing. She started by just watching my water gathering but couldn’t stay away from the interesting smells of the brew salts on the counter, so she was ushered into the basement while I re-cleaned the counter and prepped the salts for brew day. I then stepped out to the driveway to mill my grains. Owning a mill has helped with repeatability.

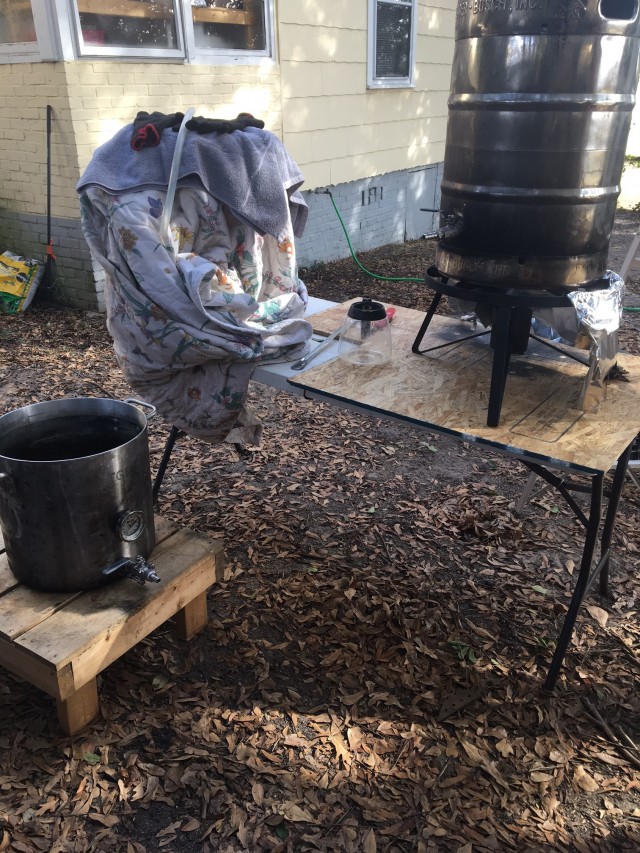
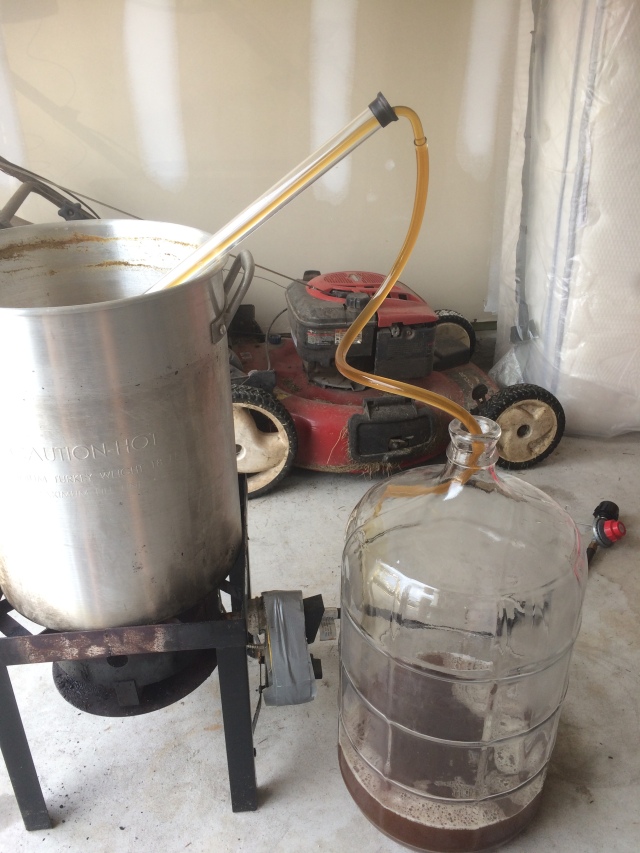
The next morning, I set up in the garage with the burner next to the open garage door. From left to right and following the hoses, we have a turkey fryer, a 15-gallon kettle with a Quick Clean Take-Apart Ball Valve which allows complete cleaning & inspection each brew day, silicon hoses to a Topsflow Brewing Pump, then my cooler Mash Tun with a brew bag. Next are my hand tools; gallon stainless pitcher, hop filter for the kettle, comically large whisk, plastic mash paddle, scales, and so on.
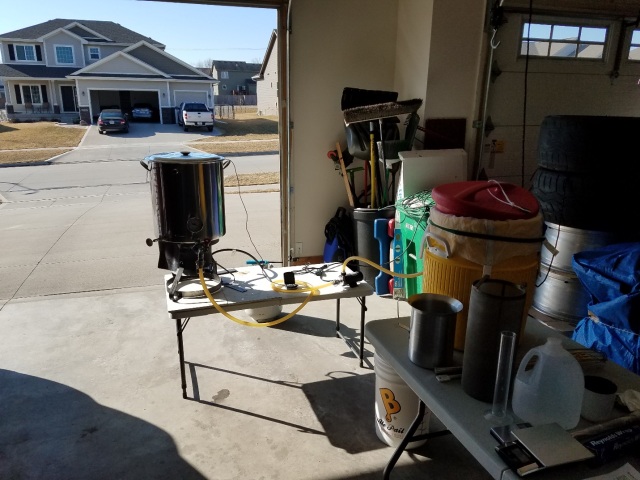
Stout 4setup

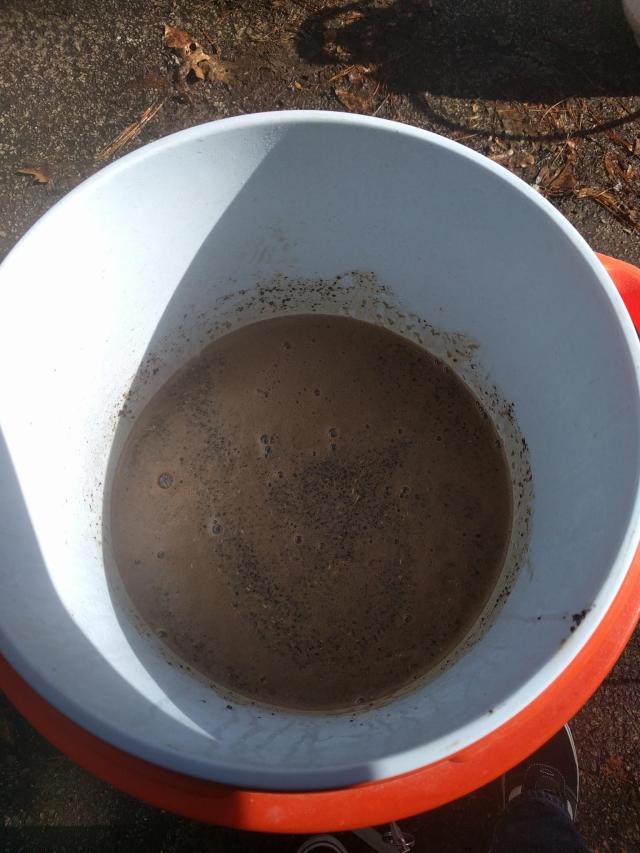
I heated my water, added salts, transferred to the mash tun, checked the temperature, mashed in, and checked the temp again. As I mentioned before, I’ve been using the same equipment and methods for quite a long time, so I usually hit my temps and volumes—if I don’t, it’s because I’ve entered something wrong in Beersmith. I hit my target mash temp of 157°F. You may recall the other iterations used a 154-155°F actual mash temp, and I admit my target was based on the target for Iteration 2 and not the actual temp. Well, recent tests have shown a few degrees (even 14°F) might not matter, right? Maybe.

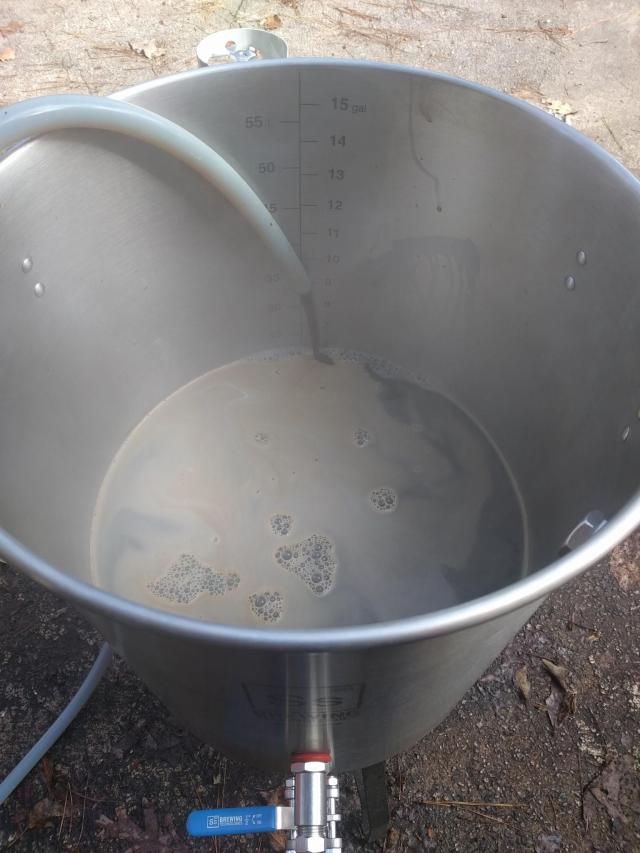
60 minutes later, I raised the bag to drain, and then transferred into my kettle. A quick sparge, and that went into the kettle too. I again hit my numbers, with the pre-boil gravity at 1.055 after adjusting for the temperature.

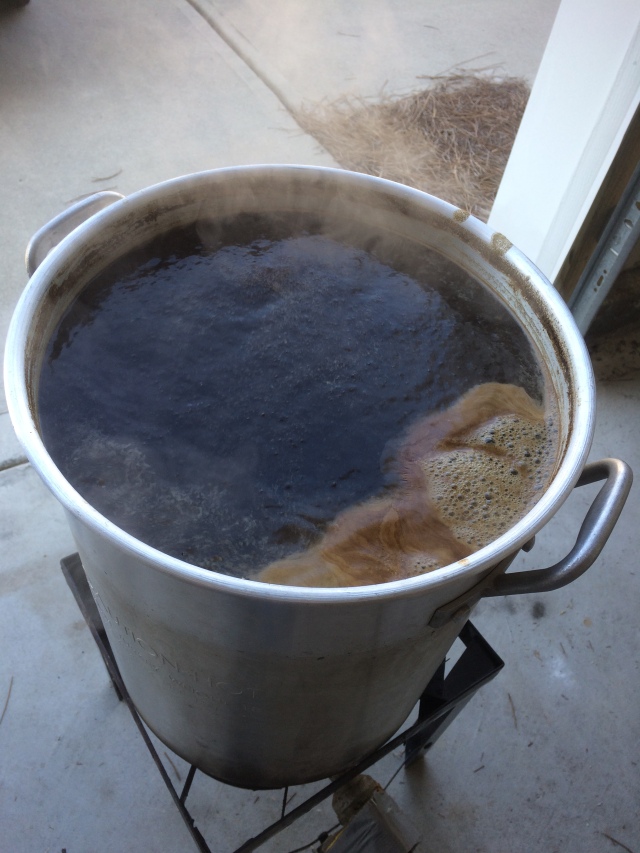
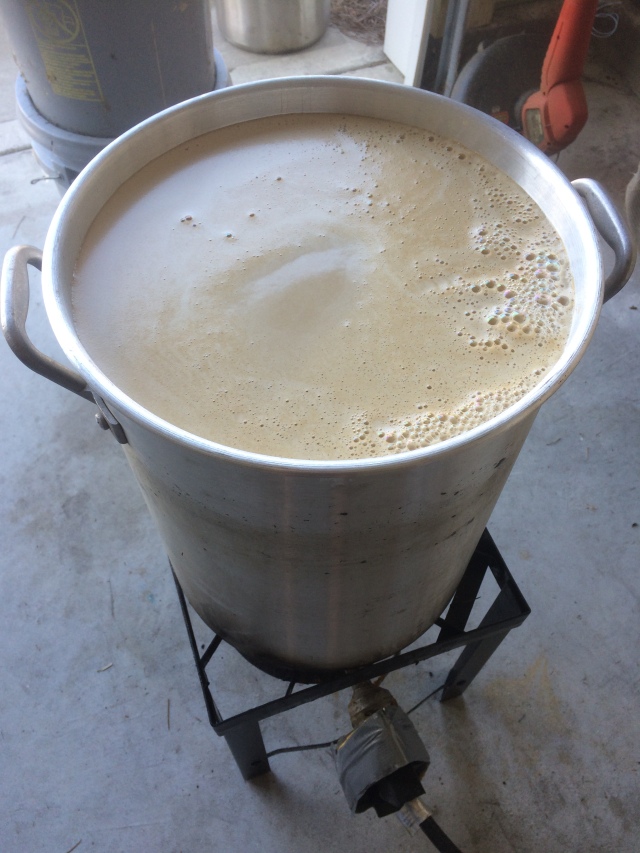
I boiled, adding hops at 60 minutes and 5 minutes as planned, then chilled to 61°F. My groundwater is COLD right now so I overshot a bit during chilling. I took a gravity reading, and I’d hit the mark again at 1.065 (after temp correction). The wort was transferred to a 6-gallon plastic carboy using a short piece of silicone hose and Siphon Spray Wort Aerator. The fermenter was then moved to my dedicated fermentation fridge, I set my Inkbird temp controller for 64°F (cooling only), and I tempted fate with a 3-piece airlock rather than blow-off hose. I correctly guessed that I had enough headspace….this time. An hour later when the foam subsided, I added a single packet of Safale US-05.

I don’t use a heater, because usually my heated basement and an active fermentation cooperate. However, this beer was sluggish to start. I had overchilled, so I propped open the fridge door and covered the fermenter with a t-shirt to prevent any skunking from sunlight. The yeast finally got to work after 48 hours. I turned the cooling off on the controller but set a high temp alarm just in case. I then warmed the beer slowly to 68°F over the course of about 7 days. I held it there for 3 more days and took gravity readings two days apart. The final gravity was stable at 1.020, which at 68% attenuation, is quite low for US-05. Either way, I cold crashed and kegged.

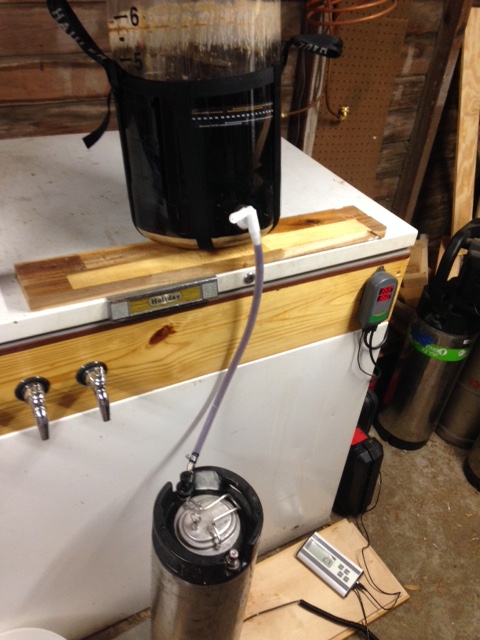
I make a lot of NEIPAs, so I use low O2 methods after fermentation. I fill a keg completely to the top with sanitizer and then push it all out with CO2. The beer is then pushed from the fermenter to the keg with CO2. I, like others, noticed enough difference to continue doing it this way. My carbonating process is either the set-it-and-forget-it at serving pressure method or, if I’m in a hurry, it gets cranked to 40+psi and shaken. I did the latter on this beer since we’re moving quickly to get you the next episode in this adventure as fast as possible.

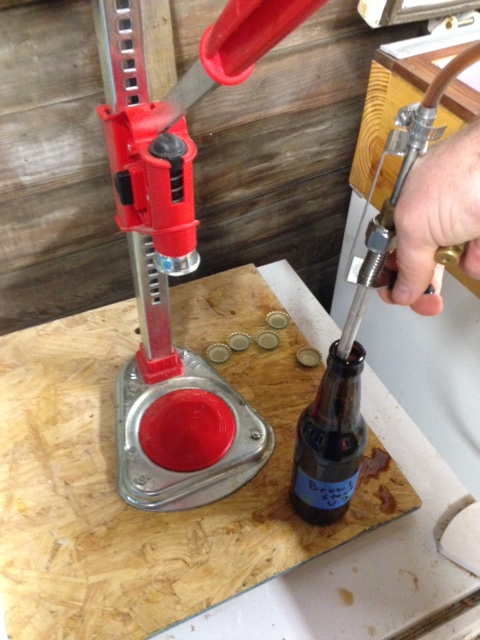
Unfortunately, I over-carbed for the first time and I needed to get samples to the next brewer ASAP. I commenced venting a few times a day and my first attempt at bottling ended up a failure of foam, half full bottles, and sticky hands. Finally, the repeated venting worked and I was able to fill bottles using my counter-pressure setup.
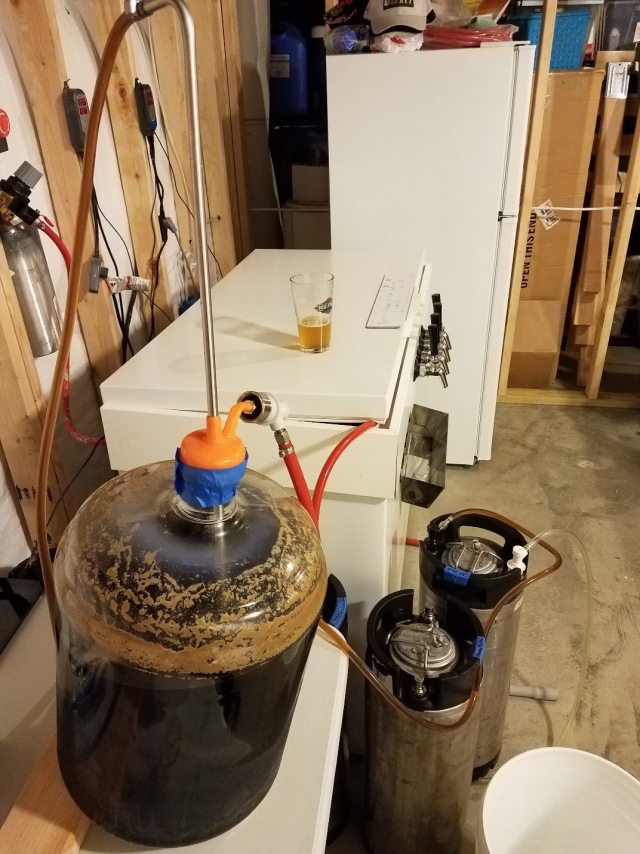
stout-4-transfer.jpg

Recipe

Maybe I’m sensitive to the higher Lovibond Chocolate used in the last iteration. Maybe the combo with 10% roasted barley pushed my buttons. Maybe the beer was young and just expressing differently than it would have if this stout were aged another month. I had not yet seen the recipe at the time of tasting, but I thought this beer likely had a significant percentage of high Lovibond grains in the grist. The positives were that it had a great aroma, but this was followed by flavors and mouthfeel I didn’t care for as described below.
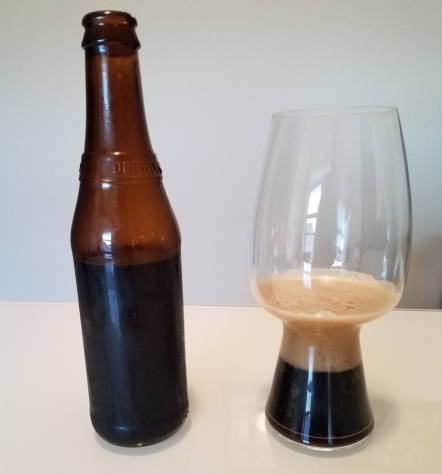
stout4-pour3-e1522261850359.jpg

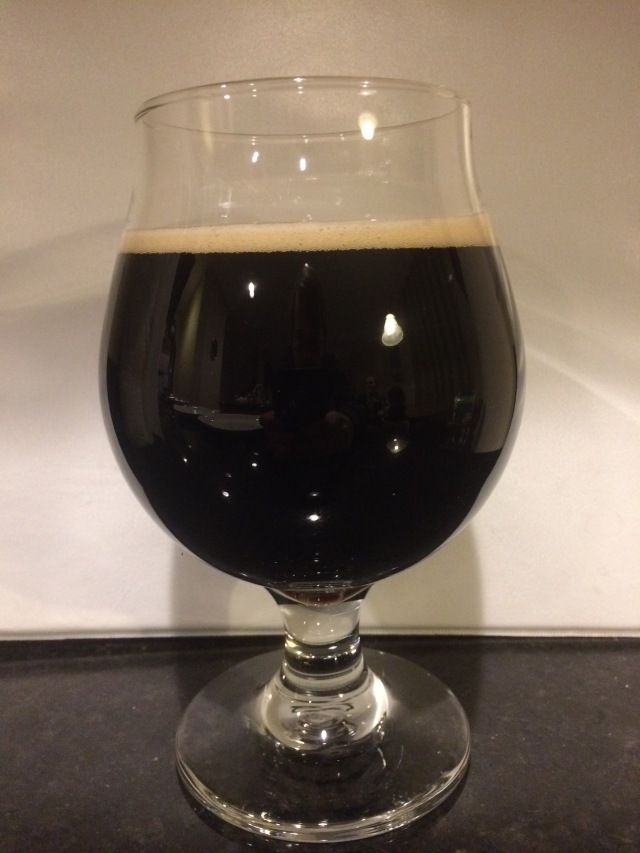
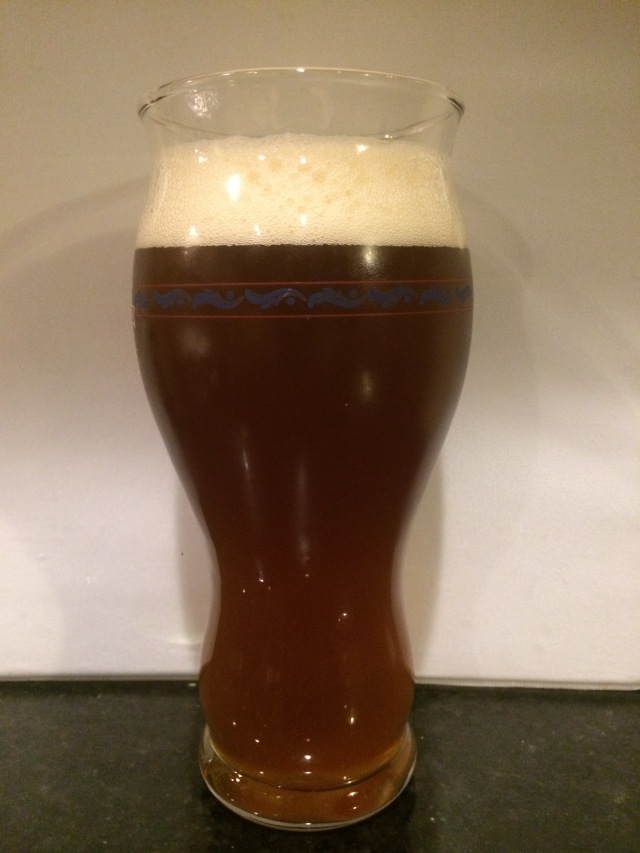
Appearance: Inky black, light-tan head that starts fluffy but fades to nothing

Aroma: Coffee, roasted malts, and chocolate that increase as the beer warms. There’s a lot happening. My 8-year-old daughter smelled it and immediately said sushi. She then clarified by saying soy sauce. So, umami? Maybe. I get that sometimes on aged stouts and it might be on the edges here. Kids have a much stronger sense of smell. Umami is certainly not high in this one to me. We’ll have to play What Do You Smell next time I open another stout.

Flavor: High amounts of coffee and roast followed by bittersweet chocolate. When cold there is a pronounced dry finish with light burnt malt flavor and no esters. Hops get lost behind the other flavors or perhaps are too complimentary to stand up and be noticed. Once the beer warms the roast malt flavor becomes prominent and malt sweetness joins the party.

Mouthfeel: The nose would have you anticipate something thicker, but this beer is very light bodied for the style. There is a black tea astringency to me, medium high carbonation, no alcohol warmth.

Comments: Bold like a dark roasted coffee served black. It gets better as it warms. It’s too bad the parting shot of this beer is the puckering sensation of the black tea astringency. That’s not to say I would score this low. Interestingly enough, I could see this as a base for a Black IPA.

Changes: I’d like to fix that black tea astringency. You’re left with that taste and sensation to ponder over between sips, which is too bad because there’s so many other great flavors in there too. Once the malt bill is dialed in, I’d play with more expressive yeasts and more flavorful American hops. This is a beer I’d have a hard time making one change at a time if I weren’t using this iterative process.

This tasting really pushed me out of the zone I thought I’d be in. I figured I’d make one small tweak, but I ended up asking how far I could go with my “one” change. I was surprisingly given more room than I had allowed myself. [Editor’s note: We discussed this change, and since there was an unintentional change in maltsters for the chocolate malt between batches, resulting in a change of around 300°L in Iteration 2 to 500°L in Iteration 3, I decided that moving back to the 300°L shouldn’t be considered part of this change. Efforts to return to the target OG and/or a more appropriate OG for the style were also not considered as outside of the realm of change that would be appropriate due to similar corrections made between certain versions of my red IPA.]

I read and reread the intent for this beer, and after bouncing ideas off my guy at the LHBS, I came to a decision. I added flaked barley and adjusted the other grain amounts to rebalance. My desire was for the flaked barley to add some body, flavor that blends nicely with roast barley, and head retention.

  • Mashed at 157° for 60 minutes
    • 72.5% 2-row
    • 10.8% Victory
    • 7.8% Flaked Barley
    • 4.4% Roasted Barley
    • 4.4% Pale Chocolate (300°L)
  • Boiled for 60 minutes
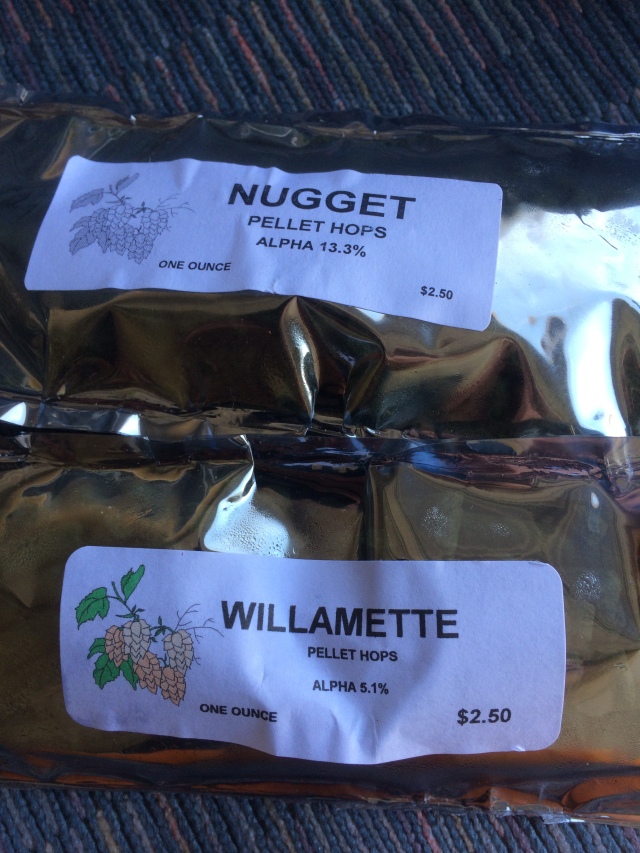
    • 0.89oz Nugget (60 min.) at 14.0% AA (41.2 IBUs)
    • 1 oz Willamette (5 min.) at 4.8% AA (3 IBUs)
  • Pitched Safale US-05 at 61°
  • OG: 1.065
  • Target FG: 1.018
  • Actual FG: 1.020
  • ABV: 5.9%
  • Kegged after FG was stable
    • Cold crashed for a day
    • Closed transfer with CO2 into a purged keg
    • Carbonated by cranking it to 40psi, then rock & roll the keg to help start absorption
  • Disaster: I discovered on I had over-carbed a beer for the first time using this method. I then commenced venting the keg a few times a day so I could bottle.
  • After a lot of venting and an aborted attempt (picture a Science Fair volcano), I was able to bottle samples using counter-pressure four days after kegging.


Tasting

I accomplished most of what I intended with the flavor, aroma, and mouthfeel. This beer is balanced and gets better as it warms. There is no longer a parting shot of puckering sensation of the black tea astringency. I’m smelling and tasting, chocolate, coffee, and a dark sweet cherry note. I’m comfortable with this beer, which in my opinion is a good quality in a stout. With a final gravity of 1.020, this is the kind of beer that coats your tongue so there’s a lot to ponder between sips. It also leaves significant lacing on the glass, which provides ample aroma each time you bring the glass to your mouth and nose.

I’ve never been a big fan of the neutral, workhorse we call US-05. When I brew this again (and I will outside this blog experiment) I would like a more expressive yeast: Denny’s Favorite WY1450 or London Ale WLP013 spring to mind. I am quite interested to see where the next brewer takes this!


Recipe Progression

Iteration 1 Iteration 2 Iteration 3 Iteration 4
Base Malt 2-row 80% 80% 80% 72.5%
Specialty Malt 1 10% Victory 10% Victory 5% Victory 10.8%
Specialty Malt 2 5% Roasted Barley 5% Roasted Barley 10% Roasted Barley 4.4% Roasted Barley
Specialty Malt 3 5% Carafa III 5% Chocolate Malt 5 % Chocolate Malt 4.4% Chocolate Malt
Specialty Malt 4 None None None 7.8% Flaked Barley
60 min. hop Nugget: 47.7 IBUs Nugget: 42.5 IBUs Nugget: 47.7 IBUs Nugget: 41.2 IBUs
5 min. hop Willamette: 3.6 IBUs Willamette: 3.3 IBUs Willamette: 2.9 IBUs Willamette: 3 IBUs
Yeast US-05 US-05 US-05 US-05
OG 1.054 1.060 1.045 1.065
FG 1.010 1.016 1.005 10.20
ABV 5.8% 5.8% 5.25% 5.9%
Posted in Brewing, Stout | 5 Comments

Stout: Tasting Iterations 2 & 3

This post is one in a series following six brewers collaborating to each make a small adjustment to a single recipe in order to improve it, then pass it along to the next brewer. We hope to learn more about the art of recipe creation as we see how other brewers approach the same recipe. The rest of the comparison tastings for this series can be found here.


The recipes for the beers being compared below are as follows:

Iteration 2 Iteration 3
Base Malt 80% 2-row 80% 2-row
Specialty Malt 1 10% Victory 5% Victory
Specialty Malt 2 5% Roasted Barley 10% Roasted Barley
Specialty Malt 3 5% Chocolate Malt 5 % Chocolate Malt
60 min. hop Nugget: 42.5 IBUs Nugget: 47.7 IBUs
5 min. hop Willamette: 3.3 IBUs Willamette: 2.9 IBUs
Yeast US-05 US-05
OG 1.060 1.045
FG 1.016 1.005
ABV 5.8% 5.25%

Taster: B. Crochet

Iteration 2, when poured, had very little carbonation. The head was barely there and dissipated quickly. Iteration 3 had a more robust head, with some good lacing on the glass as it receded to a small, but present, head. Iteration 2’s head color was tan, while Iteration 3 had more of a dark brown color, definitely attributable to the larger ratio of roasted barley. Both poured a very dark brown in color.

2&3--not me

Left: Iteration 2; Right: Iteration 3

Iteration 2 had definite chocolate notes in the aroma. Iteration 3 had more “roasty” notes to it, along with some faint dark cherry notes, with the chocolate taking a bit of a back seat.

Iteration 2, especially as it warmed, had a sweeter character to it, almost like a sweetened cold coffee. Iteration 3 reminded me of a toasted marshmallow, but without the sweetness.

The biggest differences to me were color of the head, and the more roasted tones. Iteration 3 seemed to fall more on the roasted side, which I would attribute to the additional roasted barley. I’m not sure I would say that there was a definite improvement, but I feel like some improvement was made. That could also be chalked up to personal taste. I don’t think anything was lost from the previous iteration that made a strong impact on the overall quality of the recipe.

Taster: C. McKenzie

Iteration 2 was black and poured with a moderate white head that had moderate retention. Iteration 3 was also black, but had a moderate tan head that diminished rapidly.

2&3

Iteration 2’s aroma was one of cold-brewed coffee and dark chocolate. Iteration 3 had a prominent roasted scent in the nose, as well as coffee and chocolate notes.

Iteration 2 tasted of coffee with a nice roasted note and some toasty flavors. Iteration 3 tasted strongly of roasted coffee—perhaps coffee that has been on the burner for several hours. I also noticed some type of red berry note coming through in the background, but I am admittedly not certain on the accuracy of that description.

Posted in Comparing, Stout | Comments Off on Stout: Tasting Iterations 2 & 3

Stout: Iteration 3

This post is one in a series following six brewers collaborating to each make a small adjustment to a single recipe in order to improve it, then pass it along to the next brewer. We hope to learn more about the art of recipe creation as we see how other brewers approach the same recipe. The rest of the series can be found here.


Author: B. Crochet

Brew Day

My setup is a typical 3-vessel rig. I have an HLT, a 10 gallon cooler MLT, and a 20 gallon boil kettle. For this brew, I brought my strike water to 168°F and then transferred 4 gallons of water to the mash tun (which had been preheated with boiling water). I then mashed in with all the grains, hitting my target of 154°F. I then let the mash rest for 60 minutes, stirring every 15 minutes or so.

While the mash was going, I heated the sparge water in my HLT to 180°F. After the 60 minute mash, I mashed out to a volume of 8 gallons in the MLT. I gave it a stir and let that rest for about 10 minutes.

Stout 3 mash

After the rest, I started a vorlauf with a pump recirculating back into the mash tun. Then I proceeded to collect the sweet wort. I collected about 3 gallons, and then seemed to have a stuck sparge. Normally, I would have just stirred, vorlaufed, and restarted, but instead I added the rest of the water needed to collect 8 gallons of wort. I think I made an error here in that I didn’t let it rest at all—just vorlaufed and continued to collect wort. I did collect 8 gallons, but I think the gravity was far below my target. My refractometer showed a measured pre-boil gravity of 9.8 brix (1.039 SG). Unfortunately, here I just started the boil instead of calculating if this was too low for the pre-boil gravity.

Once the wort was at a vigorous boil, I added the first hops of 1 oz. of Nugget (12.4% AA), and set timers for my next additions. 15 minutes to the end of the boil, I added my chiller to the wort, and made sure it got back up to a boil. 10 minutes from the end, I added one teaspoon of Irish Moss, and with 5 minutes to go, I added 1 oz. of Willamette (3.8% AA).

The final volume of wort in the kettle was 6.75 gallons, and it finished at 11.1 brix (1.045 SG). At this point, I realized that the gravity was too low, but I felt that if I tried any sort of remediation it might throw off the results of this exercise, as I felt my options were to boil longer (and therefore extract too much bitterness from the hops, throwing off the bitterness of the final product) or add some DME strictly for gravity points (throwing off the recipe in general). I decided to just go with what I had and hope for the best. Looking back, I believe I either went too fast when sparging, or I didn’t scale the recipe well enough for my system.

Stout 3 Kettle2

I chilled the wort down to 70°F and started to collect the wort into the fermenter. I collected about 5.75 gallons. I then pitched the yeast, aerated the wort, and set it in a 68°F room. Fermentation activity was observed 12 hours later.

Recipe

My impression upon opening and pouring Iteration 2 was that it was a little under-carbonated. Only a small head formed, with a light tan color. The aroma had some coffee notes and a bit of chocolate, just as a stout should. There was also a bready character that came through more as it warmed. The color was dark brown. I definitely tasted roasted coffee flavors. The hop character was very balanced, showing its presence, but not too bold to take over. The mouthfeel was pleasing. The aftertaste was a nice roastiness.

My biggest observation was that I did not think it was dark enough. I decided that switching the amount of roasted barley with the amount of the Victory would achieve the darker color, while still maintaining the character contributed by the Victory. The increase in roasted barley would also achieve a darker head as well—something that I find pleasing in a stout. I ended up with the following recipe:

  • Mashed at 154°F for 1 hour
    • 80% 2-row
    • 10% roasted barley
    • 5% Victory
    • 5% Chocolate
  • Boiled for 60 min.
    • 1oz Nugget (60 min.) at 12.4% (47.7 IBUs)
    • 1oz Willamette (5 min.) at 3.8% (2.9 IBUs)
  • Pitched US-05
  • OG: 1.045
  • FG: 1.005
  • ABV: 5.25%
  • Kegged, then force-carbed with a carb-stone lid. Started at 4 PSI, then ramped up 2-3 PSI every couple of hours until reaching 12 PSI, then rested for 24 hours at 12 PSI
  • After force-carbing, bottled with a counter-pressure filler


Tasting

The biggest differences I could detect from the previous iteration were the color and the mouthfeel. The color is definitely darker than the previous iteration, so I achieved that aspect of what I set out to change. The mouthfeel was definitely thinner than I would have liked, and I attribute that to the lack of residual sugars in the beer. The head was a nice brown color, and the carbonation levels were more pleasing to me. The bready character from the last iteration was definitely more muted, considering the reduction in Victory malt. The coffee and chocolate notes were still present in the aroma, and the roastiness in the flavor was still present.

If I were to brew this beer again, obviously, I would make sure that I hit the target OG range of 1.054-1.056. But putting that aside, I think I would change the percentages of the roasted barley and Victory to be equal parts at 7.5% each with the goal of keeping more of the baking bread contribution of the Victory.


Recipe Progression

Iteration 1 Iteration 2 Iteration 3
Base Malt 2-row 80% 80% 80%
Specialty Malt 1 10% Victory 10% Victory 5% Victory
Specialty Malt 2 5% Roasted Barley 5% Roasted Barley 10% Roasted Barley
Specialty Malt 3 5% Carafa III 5% Chocolate Malt 5 % Chocolate Malt
60 min. hop Nugget: 47.7 IBUs Nugget: 42.5 IBUs Nugget: 47.7 IBUs
5 min. hop Willamette: 3.6 IBUs Willamette: 3.3 IBUs Willamette: 2.9 IBUs
Yeast US-05 US-05 US-05
OG 1.054 1.060 1.045
FG 1.010 1.016 1.005
ABV 5.8% 5.8% 5.25%
Posted in Brewing, Stout | 8 Comments

Stout: Tasting Iterations 1 & 2

This post is one in a series following six brewers collaborating to each make a small adjustment to a single recipe in order to improve it, then pass it along to the next brewer. We hope to learn more about the art of recipe creation as we see how other brewers approach the same recipe. The rest of the comparison tastings for this series can be found here.


The recipes for the beers being compared below are as follows:

Iteration 1 Iteration 2
Base Malt 80% 2-row 80% 2-row
Specialty Malt 1 10% Victory 10% Victory
Specialty Malt 2 5% Roasted Barley 5% Roasted Barley
Specialty Malt 3 5% Carafa III 5% Chocolate Malt
60 min. hop Nugget: 47.7 IBUs Nugget: 42.5 IBUs
5 min. hop Willamette: 3.6 IBUs Willamette: 3.3 IBUs
Yeast US-05 US-05
OG 1.054 1.060
FG 1.010 1.016
ABV 5.8% 5.8%

Taster: T. Bowen

Version 2 pours very dark. Some light foam on the surface that builds slightly as it sits, then fades to a few wispy bubbles on the surface.

1&2

The nose on Version 1 had a touch of coffee with a slightly stronger scent of espresso. The nose also had a milky-like sweetness to it.

At first whiff of Version 2, the nose had a heavy yeasty aroma to it, which morphed into a milky nose—admittedly more pleasant than the yeast bomb at first. The more I smelled it, the more roasted, milky notes came out. Version 2 has almost a smoky note to the flavor, which I guess I could attribute to the roasted barley and chocolate malt.

I got some nicely balanced dark chocolate bitterness on the back end of Version 1. As it warmed up, I there was a heavy dark chocolate sweetness that was on the front end. Version 2 is not as chocolate forward on the palate as Version 1. However, more chocolate seems to come to the front of the palate as the beer warms. In addition to more chocolate notes, the beer puts off more espresso notes as it warms as well. Version 2 seems to have a fuller, creamier mouthfeel than Version 1.

Taster: C. McKenzie

Both Iterations 1 and 2 were a deep black. Iteration 1 poured with a moderate head that had poor retention. Iteration 2 had minimal head (more of a light foam on top) that receded almost immediately.

1&2--me

Iteration 1 smelled of cold brew coffee with dark chocolate. There was also a strong presence of burnt toast in the nose. Iteration 2 had a big dark chocolate aroma, which seemed to me to include some of the fruit notes that often accompany smelling/tasting a bar of dark chocolate (although my wife disagreed with me on the fruit notes when I asked her if she also smelled that since I was having a hard time placing that particular aroma). There were also notes of coffee and toast.

Iteration 1 tasted of chocolate, coffee, toast, and had an earthy note to it as well. Iteration 2 tasted of chocolate (although the flavor of this was less than the aroma might imply) and coffee. This beer definitely had a fuller mouthfeel, which lent itself to the flavors seeming slightly richer than they did in Iteration 1. There was also a definite level of roastiness present that is not there in Iteration 1. A hint of toast is detectable, but it is less obvious than in Iteration 1, which I think is a positive thing.

Posted in Comparing, Stout | Comments Off on Stout: Tasting Iterations 1 & 2

Stout: Iteration 2

This post is one in a series following six brewers collaborating to each make a small adjustment to a single recipe in order to improve it, then pass it along to the next brewer. We hope to learn more about the art of recipe creation as we see how other brewers approach the same recipe. The rest of the series can be found here.


Author: T. Bowen

Brew Day

I was scheduled to brew by January 6. Never one to be completely on schedule all the time, I brewed the day after my deadline. Sunday mornings have become a brew day for me, more often than not, plus I was procrastinating since I was not looking forward to brewing outside in 25°F weather. I’m used to sweating on brew days, not warming my hands by the propane heater every chance I got. Although, with this being a stout without any long hopstands and/or whirlpools, I was confident I could knock this out in less than four hours.

I’ve been battling mash temps for quite some time now. I brew on a straight forward system: 10 gallon orange Igloo mash tun with a false bottom, converted keggle HLT, and a 10 gallon boil kettle. The biggest problem I’ve been having is hitting my target mash temps. I’ve tried preheating my mash tun with hot (~130°F) tap water while the strike water was heating; I’ve tried overheating my strike water 10°F+; I’ve tried just preheating with strike water. All of that, and I’m still fighting that fight.

For this brew day, especially with the freezing temps, I tried a concerted effort of all tactics. First, before getting the strike water going, I added about 5 gallons of hot tap water to the mash tun and sealed it up to preheat. Also of note, my grains (already milled) had been sitting inside the house since picking them up on Saturday. Next I got my water salts weighed out, added to the strike water, and lit the burner shooting for about 168°F (target mash temp was 157°F). In about 20 minutes or so, I was at 168-170°F on my strike water. I then emptied the mash tun of the preheat water, dumped in all my strike water, and sealed it up while I ran inside the grab the grains. I was back outside adding grains to the mash tun within the next 2-3 minutes. I added the grains and stirred to break up dough balls and thoroughly incorporate the grains. Once I got it mixed to my satisfaction, I checked the mash temp…155°F. I missed it once again! Oh well, I thought, I guess I’m mashing this at 155°F. So I sealed it up, covered it in towels and a quilt, and let it rest for 60 minutes.

Stout 2mash tun

While I was mashing, I took the time to install some upgrades on my boil kettle. Since I started brewing, my boil kettle has been just a 10 gallon pot with some volume markings I etched. But I finally picked up a thermometer and bulkhead and 3-piece ball valve and bulkhead. Sometimes the smallest additions to your brewery can make some of the biggest differences in your brew days. These two additions made this brew days much easier and I’m looking forward to many more of these easier brew days with these additions.

Stout 2kettle

Thankfully, after the 60 minute mash, I checked temps again and I was still dead on 155°F. Great. I can hold temps, I just can’t hit temps. I then proceeded to vorlauf and sparge and hit my numbers with a preboil volume of 7 gallons. The boil was rather uneventful and the rest of the day went off without a hitch…for the most part. I’m usually pretty dead on my gravity number, typically within one or two points. But today I was four points off. My estimated OG was 1.056. My actual OG came in at 1.060. Of course, I would always rather over- than under-shoot my gravity. But I was still curious what caused the higher gravity, especially since I hit all my volume numbers. I always set my efficiency at 65% when calculating recipes. So either I’m getting more efficient, or possibly my grain bill was not exactly what I ordered? Either way, 1.060 compared to 1.056 is not a big enough variance to cause me to lose any sleep. I proceeded to chill down to about 70°F in about 20 minutes, which is about the only time all day I was thankful for the freezing temps—I even had to thaw out the outside spigot to get water flowing for my immersion chiller. Finally, I racked about 5.25 gallons into my 7 gallon Fermonster, hit it with about 15 minutes of oxygen (air stone with pump), pitched the yeast, and finally sat down at the fireplace to warm my freezing hands and feet.

Fermentation was fairly mundane. I ran a blowoff tube when I pitched yeast because that’s pretty standard practice for me. Moreover, I had not used US-05 in over a year, and I couldn’t remember if it was a vigorous fermenter or not. Thankfully, the blowoff was not needed as I had plenty of headspace in the 7 gallon Fermonster. I cold crashed 10 days after pitching yeast when the gravity had slowed down to 1.016. Even though I mashed a hair lower than I planned, the beer still finished high enough to have some residual sweetness to balance the roast. I kegged right at 5 gallons two days later.

Stout 2transfer

When I got ready to bottle, I realized I was missing an important piece for my redneck engineered bottling gun. When I don’t feel like setting up my beer gun, I typically use the popular method of a racking cane in a picnic tap with a #2 stopper as a pseudo counter pressure filler. But the #2 stopper was nowhere to be found. Not wanting to pass on beer that could end up being flat and/or oxidized, I begrudgingly got out the beer gun and bottled with it.

Stout 2bottling

Recipe

First things first, I was more impressed with Iteration 1 of this beer than I thought I would be. That’s not an indictment on the brewer at all, but rather a testament to the fact that I tend to gravitate more towards stouts with some sort of adjunct as opposed to straight up stouts. The beer poured with little to no head. The beer was fairly carbonated in the mouthfeel, at least enough for my palate. But the head was virtually non-existent, save for some light, wispy foam on the surface which faded quickly. When I received the beer from the previous brewer, he had just bottled it that week. Therefore, I let it sit at least 2.5 weeks in my “cellar” before opening, and subsequently opened another bottle after 3 weeks. This time of year, my house sits around 67°F, so that could have hindered the bottle conditioning as well.

The nose on the beer had a touch of coffee with a slightly heavier blanket of espresso over the top. It’s interesting that there was no lactose in this beer, but the nose also had a milky-like sweetness to it. It’s very inviting, almost like chocolate milk and espresso got together and had a baby.

Overall, the body was a little lacking, i.e., it’s a little thinner on the palate than the nose lends. But, the most interesting part of this beer was how it changed as it warmed up. I like to drink my stouts very slowly so I can really let it open up and bring out subtle nuances. Initially, the first few tastes when it was cold tilted the beer more towards a porter than a stout. I got some nicely balanced dark chocolate bitterness on the back end. But as it warmed up, I started to get some heavy dark chocolate sweetness, if that makes sense, on the front end. Overall, a nicely done beer that really gets better the longer you enjoy it and let it open up.

When it came time for me to draft my recipe, I wrestled with decisions more so than I thought I would. I had a couple goals in mind with my recipe. For starters, I wanted more body in the beer. Additionally, I wanted to ramp up the chocolate notes which would, hopefully, also prop up some of the espresso in the background. I was hopeful I could get more body my mashing a little higher and hopefully have the beer finish a little higher than the previous version.

I knew I was likely keeping the base malts (2-Row and Victory) and hops (Nugget and Willamette) the same. So I really just had to decide what to do with the roast malts. First, I considered subbing in Carafa III Special for the Carafa III. Typically, I prefer to use Carafa III Special for color in my stouts. Carafa III Special is dehusked and, in my opinion, is a little smoother and not as roasty as regular Carafa III. Ultimately, I decided against that change because I didn’t feel it would make a drastic enough difference to accomplish what I was after. Next, I considered subbing out the Roasted Barley for Chocolate Malt to boost up the chocolate notes and dial back the roast flavor, which would hopefully boost the mouthfeel a bit. I decided against this because I felt it would be too drastic of a change and it would have too little roast. I even considered subbing out Victory for Flaked Oats because, well, I absolutely love Flaked Oats and they always provide a nice pillowy mouthfeel. I decided against this as well because I kept coming back to the roasted malts. Finally, I decided on outright dropping the Carafa III and subbing in some Chocolate Malt in hopes of the Roasted Barley and Chocolate Malt getting together and having a grand old time and giving me what I was hoping for. With all of that said, here’s what I landed on:

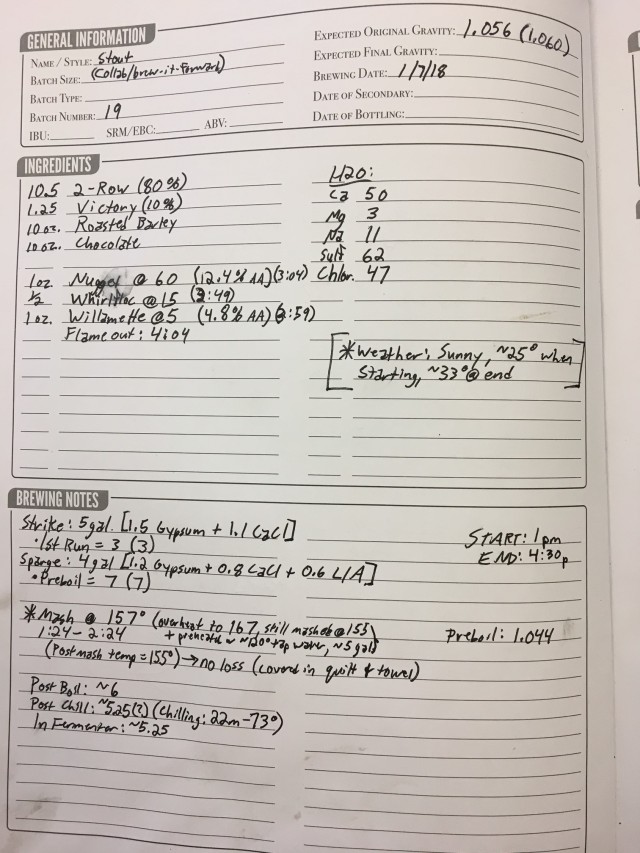
  • Mashed at 155°F for 1 hour (targeted 157°F)
    • 80% 2-Row
    • 10% Victory
    • 5% Roasted Barley
    • 5% Chocolate
  • Boiled for 1 hour
    • 1 oz. Nugget (60 min) at 12.4% AA (42.5 IBUs)
    • 1 oz. Willamette (5 min) at 4.8% AA (3.3 IBUs)
  • Water Profile (ppm): [Black Balanced] Calcium (50); Magnesium (3); Sodium (11); Sulfate (62); Chloride (47)
  • Pitched US-05 (one packet; rehydrated)
  • OG (target): 1.056
  • OG (actual): 1.060
  • FG (actual): 1.016
  • ABV: 5.8%
  • Kegged, force carbed, bottled with beer gun

Stout 2brew log

Tasting

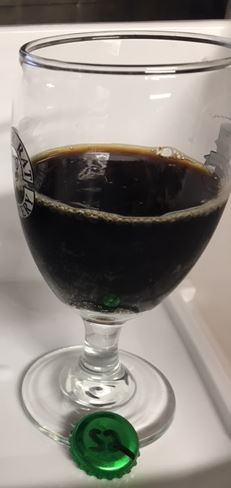
Version 2 pours very dark, as well it should. Not much to discuss on the color. Some light foam on the surface that builds slightly as it sits, then fades to a few wispy bubbles on the surface. At first whiff, the nose had a heavy yeasty blanket to it. It wasn’t entirely off-putting, but it was a little surprising. As I dove my nose deeper into the beer, the yeasty notes morphed into a milky nose which was admittedly more pleasant than the yeast bomb at first. The more I smelled it, the more roasted milky notes came out. This beer almost had a smoky note to the flavor, which I guess I could attribute to the roasted barley and chocolate malt. More chocolate seemed to come to the front of the palate as the beer warmed. In addition to more chocolate notes, the beer put off more espresso notes as it warmed as well. Version 2 seems to have a fuller, creamier mouthfeel than Version 1, which could easily be attributed to the higher finishing gravity (1.016 vs. 1.010). Overall, this is a solid beer that I think could be improved with some adjuncts. In fact, after bottling beers from the keg for this project, I racked the remainder onto espresso beans, vanilla beans, and cacao nibs.

Iteration2 pour

What I Would Change

I have a few thoughts on improving this beer if I were to brew it again. For starters, I’d like to include some flaked oats in the grist. I’m a big proponent of flaked oats in my stouts. I love the fuller creamier mouthfeel they provide while staying out of the way of the darker grains. While Version 2 had a fuller, creamier mouthfeel than Version 1, it still wasn’t exactly where I wanted it to be. Additionally, I think Version 2 needs more chocolate flavors to balance some of the roasted notes. The roasted notes are not overpowering, but they come across a little smoky and could probably be tamped down some with some softer chocolate notes.


Recipe Progression

Iteration 1 Iteration 2
Base Malt 2-row 80% 80%
Specialty Malt 1 10% Victory 10% Victory
Specialty Malt 2 5% Roasted Barley 5% Roasted Barley
Specialty Malt 3 5% Carafa III 5% Chocolate Malt
60 min. hop Nugget: 47.7 IBUs Nugget: 42.5 IBUs
5 min. hop Willamette: 3.3 IBUs Willamette: 2.9 IBUs
Yeast US-05 US-05
OG 1.054 1.060
FG 1.010 1.016
ABV 5.8% 5.8%
Posted in Brewing, Stout | 1 Comment

Stout: Iteration 1

This post is one in a series following six brewers collaborating to each make a small adjustment to a single recipe in order to improve it, then pass it along to the next brewer. We hope to learn more about the art of recipe creation as we see how other brewers approach the same recipe. The rest of the series can be found here.


Author: C. McKenzie

Collaborative Iterations

After brewing ten iterations of the same style, it was absolutely refreshing to design a recipe for something different. I don’t at all regret only brewing red IPA for an entire year, but my “to brew” list has been steadily growing with new ideas. The time to move forward had come.

In the spirit of moving forward, things are going to look a little different this time around. While these posts will still be focused on brewing a single style that will change and grow (and hopefully improve) over the course of several iterations, I will not be the only one contributing to these various versions of the recipe. Five others will be joining me in this journey, and each will have a turn at changing something with this recipe. I’m personally really looking forward to having other perspectives on recipe creation represented here.

Brew Day

Overall, this brew day felt like how I like my brew days to feel: relaxing. The focus on repeated results with brewing the red IPA forced me to learn my system better than I knew it before, which allowed me to better estimate what kind of volumes I would get and how I needed to approach the day, even though I had a different recipe with a different amount of grains in front of me. That kind of confidence in my expectations felt really good.

I mashed in and went about my day for a while. When I returned to gather my boil wort, I gathered some of it in a cup and set it aside for a pre-boil gravity measurement. While I was letting my sample cool down enough to take a gravity reading, I was also bringing my kettle up to a boil. During the course of moving some things around and trying to clean up a little during the downtime, I kicked over my pre-boil wort sample. Instead of taking a sample out of the kettle (it was near boiling and I didn’t have anything handy that wouldn’t melt or shatter from thermal shock to take another sample), I simply relied on my calculations and hoped they were accurate.

Stout 1 boil

After adding the hops, cutting the flame, and chilling my wort, I gathered the wort into my carboy and realized that my evaporation rate apparently wasn’t as much as I anticipated based on past numbers. This left me with closer to 6 gallons in the carboy instead of my expected 5.5, which resulted in being a little lower in gravity than what I had targeted, although not by much. I carried on, pitched my yeast, and within 24 hours had a nice, thick krausen atop my beer.

Strout 1 hops

Recipe

The origin of this recipe is an adjustment to and hybrid of previous stout recipes I’ve made. My initial thoughts behind this were to seek after a standard stout roastiness, with some of the chocolate and coffee notes that come with it, while also adding a layer of depth with some nutty, toasted flavors. The goal with the hop selection was to add somewhere close to a 1:1 BU:GU (bitterness units to gravity units) ratio and achieve some earthy and herbal notes without too much fruit or floral character. In my mind, this hop profile fits better with the chocolate and coffee notes often associated with dark malts. I’m a big fan of earthy coffee, which probably influenced this decision. The resultant recipe is as follows:

  • Mashed at 155⁰ F
    • 8 lbs. 2-Row (80%)
    • 1 lb. Victory (10%)
    • 0.5 lbs. Roasted Barley (5%)
    • 0.5 lbs. Carafa III (5%)
  • Boiled for 1 hr.
    • 1 oz. Nugget (60 min) at 13.3% AA (47.7 IBUs
    • 1 oz. Willamette (5 min) at 5.1% AA (3.6 IBUs)
  • Pitched US-O5
  • OG: 1.054
  • FG: 1.010
  • ABV: 5.8%


Tasting

This beer poured opaque and had a moderate, tan head that had moderate retention.

The aroma was one of cold-brewed coffee. There was a hint of dark chocolate as well—that particular scent of a chocolate bar made with 80% or more cacao. A hint of earthiness also came through, and reminded me (pleasantly) of wet dirt—like digging deep into rich soil a few days after a heavy rain.

The taste had notes of dark chocolate that shifted to a strong flavor of toast. These flavors faded into a hint of darkly roasted coffee that held some acridness in the finish.

Stout 1 pour

What I Would Change

Allow me to preface this section by stating that what follows is my thoughts on how I would change this beer if I brewed it again next time. However, I will not be the one brewing the next iteration of this beer, and the brewer for Iteration 2 will not see my tasting notes or thoughts on this beer until after he has brewed Iteration 2. Any similarities between preferences will be genuine and not influenced by each other’s commentary on the beer, and any differences will be a true display of the differences in individual perception of flavor.

With that said, the acridness I mentioned above is present as a background note, but it is slightly off-putting when it’s noticeable (which is admittedly not on every sip). Perhaps 10% roasted malt is a bit too much, or at the least 5% Carafa III (which is roasted to somewhere over 500⁰ Lovibond) was a little too much when paired with the roasted barley (roasted to 300⁰ L). If I brewed this again, I would definitely want to take some steps to remove this acridness, and that would likely mean lowering the percentage of roasted grains, pairing the roasted barley with another malt roasted to a lower Lovibond than the Carafa III, or using the special/dehusked version of Carafa III instead.

I said I wanted toasted flavors in this beer, and they definitely came through. I think, though, that the flavor is a bit too much and would pair better with the other flavors if it was slightly less pronounced. I also think this beer might benefit from a little more hop character, but I admit that I’m on the fence about this point. The bitterness level is great for the style and balances the malt well; however, while the malt is definitely the star of this style, I think the overall flavor might benefit from using a more expressive hop at the end of the boil or adding more of the Willamette at the 5 minute mark.

The body of the beer was a bit lacking, and it finished thinner and dryer than I’d prefer for a stout. I would definitely consider mashing higher, having a higher OG, or using a different yeast to avoid the beer drying out to 1.010 if I were to brew this again.

Posted in Brewing, Stout | 1 Comment

Iteration 10 & Competition Results

This post is one in a series of making small adjustments to a single recipe in order to improve it, learn more about the impact each ingredient has on the finished product, and the art of recipe creation. The rest of the series can be found here.


Brew Day

With a busy weekend in front of me but needing to brew then to time things right for the homebrew competition, I opted to squeeze in a brew day on a full Saturday and set my alarm for the same time as a work day. I heated my strike water and mashed in, overshooting my target mash temperature by a little over one degree—not enough for me to worry about correcting. I then left the house for a fun-filled morning of errands and returned a little over four hours after I had mashed in.

Iteration 10 boil

After collecting my first runnings and two quick batch sparges, I brought the wort to a boil and took a gravity reading. Based on my pre-boil gravity and usual boil-off rate, it looked like I was right on track for my target OG. After an uneventfully smooth boil, I cooled my wort, transferred to my carboy, and pitched the yeast. A gravity sample revealed that I had undershot my target OG by two points—not terrible.

In less than 24 hours, signs of fermentation had begun.

Iteration 10 transfer

Recipe

Iteration 9 surprised me in that it genuinely lacked the hop punch I expected from 5 ounces of dry hops. Instead, I was greeted with a grassy taste for the first few bottles. Although this did fade some over time, it was not replaced by the flavors I had hoped for. In order to keep the grassiness at bay and to try to up the hop flavor in general, I decided to make a few adjustments to my hopping schedule. First, I decided to add more hops in the kettle to try to increase the hop flavor and not the aroma only.

The other big change I wanted to make ended up being two changes. Although the grassiness I had tasted in Iteration 9 did fade with time, I wanted to avoid it altogether. I was frankly unsure where the flavor was coming from based on a couple factors. The hop charge I used for Iteration 9’s dry hops was larger than I’d ever used before. I could not be certain that the amount of hops I used combined with the length of contact time did not play a part in that off-flavor, so I wanted to eliminate that as a possible source. I decided to use one ounce less for one day less.

The second of these changes was a last-minute decision based on hop availability at my LHBS. For Iteration 8, I used Amarillo hops and got good results from them. When I was purchasing hops for Iteration 9, I noticed my LHBS did not have those same Amarillo hops available, although they did have some with a slightly different AA% and in a different package. I went with those, and when I opened them on brew day, I found that they were a slightly darker green than I’m used to seeing in my hops and their aroma, although not off enough for me to discard them, was certainly not as present as I expected based on past experiences with this particular hop. With the end results of that beer yielding that grassy off-flavor, I was left questioning if this set of hops had been mishandled in the processing or packaging process. It wasn’t a chance I wanted to take again. So, when I went to buy ingredients for this iteration, I asked if there were any other packages of Amarillo left, and found out that the four ounces on display in the suspect packaging were the last four ounces of Amarillo available.

Unwilling to knowingly use potentially subpar ingredients, I thought back on the flavors I had really enjoyed from the hops in my last few batches. The orange character I had gotten recently was working really well with the dark fruit flavors from the malt, so I definitely wanted something that had that character. I also had enjoyed the apricot notes I first noticed in Iteration 7, meaning it was from the Amarillo; however, that flavor was secondary in importance to the orange for me. Unable to find a hop at the store that would exhibit those two characteristics outside of the suspect Amarillo, I opted to replace the Amarillo addition with Citra, yielding the following recipe:

  • Mashed at 151⁰ F for 4+ hrs.
    • 10 lbs. 2-Row
    • 1.2 lbs. Crystal 120
    • 1 lb. Vienna
  • Boiled for 1 hr.
    • 0.5 oz. Magnum (60 min) at 14.7% AA
    • 0.5 oz. Magnum (30 min) at 14.7% AA
    • 2 oz. Cascade (10 min) at 5% AA
    • 2 oz. Centennial (5 min) at 9.7% AA
    • 1 oz. Citra (0 min) at 12.5% AA
    • 1 oz. Citra (hop stand at <180⁰ F) at 12.5% AA
  • Pitched US-O5
  • OG: 1.064
  • FG: 1.010
  • ABV: 7.1%
  • Dry hopped 2 oz. Cascade, 1 oz. Centennial, and 1 oz. Citra for 3 days.
  • Bottled and primed with 4 oz. of priming sugar.


Tasting

This beer poured with a good head, had excellent retention, and was amber/red in color. The aroma smelled strongly of orange, with hints of plum and Bing cherry. The flavor had a definite orange character, with some hints of grapefruit in the background. There were also some cherry notes.

Iteration 10 tasting

Overall, the hop character of this beer was excellent. The flavor and aroma were both strongly present and at the level I’ve been trying to achieve. This beer now definitely drinks like an IPA. The only thing I really wish were different is the malt presence. The hop additions have been a balancing act, as the malt is of just as much importance to a red IPA as the hops, in my opinion. The delightful dark fruit character that I’d been getting from previous versions of this recipe was hidden by the strong hop presence. I don’t think I would change the level of hop flavor and aroma I got from this iteration, but I do wonder if there’s a way I could tread that line a little better.

Competition Results

It was always my plan to brew this beer over and over for one year and then enter it in a competition as the final culmination of this project. As promised, I’m giving a breakdown of the results. I’ll also give the disclaimer that my tasting notes above were taken prior to getting these results back, so I’ll also try my best to reconcile those.

My overall score was a 30—disappointing to say the least, but I’ll get to my thoughts later. Both judges noted astringency in the beer and that the bitterness was too much and needed balancing with more malt. I’ll agree that this version was out of balance and needed more malt in the flavor. What I didn’t notice before was that the bitterness was definitely over the top, although I still wouldn’t personally call it astringent—just out of balance IBUs. However, that’s my opinion versus these judges who both agreed on that descriptor (and certainly not a defense of my beer in the face of this criticism).

I scored a 9 & 10 out of a possible 12 for Aroma. Both scoresheets note a sweet aspect to the aroma with a spiciness from the hops. I would venture to say that the sweetness was the malt coming through where it failed to in the flavor, but I’m surprised neither noted an orange aroma as I believed that was the predominant scent. My wife (who did not know anything about this beer or what I was going for) smelled it and her only response was that it smelled like orange. I’m also a bit confused about the spicy notes they perceived, but since two different judges both noted it, I suppose it’s there.

The Appearance scored a 3/3 on both scoresheets, both noting the haziness but red color and long-lasting head.

Flavor scored a 9 & 10 out of 20 (ouch). As mentioned above, both judges here focus on the bitterness. Both note that there’s a brief sweetness to the beer but then the bitterness comes back to dominate.

Mouthfeel scored a 2 & 3 out of 5, again both judges focusing on the astringency.

This beer received a 5 & 6 out of 10 for Overall Impression. Both scoresheets again here focus on bitterness as the primary reason for the score. One judge notes that more base malt would help and another notes that there was a good choice of ingredients but too many IBUs.

To be honest, I’m rather disappointed in these results. I think, though, that they show at least two things. The first is that perhaps I shouldn’t have upped the hops quite as much as I did all at once; the second is that perhaps this project has been more insular than was truly beneficial. Sure, I compared these beers to one another throughout the process, and sure these beers have ultimately been for me and my ideal red IPA, but others’ feedback has been lacking. That’s just one reason why I’m very excited for the next project I’ll be launching in January, where other brewers will be collaborating with me on this iterative brewing idea.

Final Thoughts

If I had to do it again, I’d increase the hops incrementally as I had in previous back to back iterations. Unfortunately, the lack of hop punch in Iteration 9 combined with the lack of time to brew any more iterations prior to the competition inspired me to increase the hop charge like I did. This beer certainly isn’t where I’d like it to be in its final form, but it’s given me a much better understanding of how to accomplish certain things in brewing. I think a better assessment, though, is asking myself if this beer is where I’d like it to be after 10 versions. It’s definitely improved immensely from Iteration 1, and I think one or two more tweaks would fix the issue of balance and let the malt character I enjoyed so much in previous versions truly shine through—so, the answer is a firm “probably.” I’ll certainly revisit this beer again in the future and adjust some elements of the recipe, but for now, the year is over, and my palate needs a red IPA break.

Recipe Progression

Iteration 1 Iteration 2 Iteration 3 Iteration 4 Iteration 5 Iteration 6 Iteration 7 Iteration 8 Iteration 9 Iteration 10
Base Malt 2-row 10.25 lbs. 10.25 lbs. 10.25 lbs. 9 lbs. 10 lbs. 10 lbs. 10 lbs. 10 lbs. 10 lbs.  10 lbs.
Crystal Malt 1 lb. C80 1 lb. C120 0.75 lbs. C120 1.25 lbs. C120 1 lb. C120 1.2 lbs. C120 1.2 lbs. C120 1.2 lbs. C120 1.2 lbs. C120  1.2 lbs. C120
Specialty Malt 0.5 lbs. Special B 1 lb. Munich 1 lb. Vienna 1 lb. Vienna 1 lb. Vienna 1 lb. Vienna 1 lb. Vienna 1 lb. Vienna
60 min. hop 0.5 oz. Simcoe 0.5 oz. Simcoe 0.5 oz. Simcoe 0.5 oz. Simcoe 0.5 oz. Simcoe 1 oz. Magnum 0.5 oz. Magnum 0.5 oz. Magnum 0.5 oz. Magnum 0.5 oz. Magnum
30 min. hop 0.5 oz. Simcoe 0.5 oz. Simcoe 0.5 oz. Simcoe 0.5 oz. Simcoe 0.5 oz. Simcoe 0.5 oz. Magnum 0.5 oz. Magnum 0.5 oz. Magnum 0.5 oz. Magnum
15 min. hop 0.5 oz. Cascade 0.5 oz. Cascade 0.5 oz. Cascade 0.5 oz. Cascade 0.5 oz. Cascade 0.5 oz. Cascade 0.5 oz. Cascade
10 min. hop 0.5 oz. Centennial 0.5 oz. Cascade 0.5 oz. Cascade 2 oz. Cascade
5 min. hop 0.5 oz. Centennial 0.5 oz. Centennial 0.5 oz. Centennial 0.5 oz. Centennial 0.5 oz. Centennial 0.5 oz. Centennial 0.5 oz. Centennial 0.5 oz. Centennial  2 oz. Centennial
0 min. hop 0.5 oz. Simcoe 0.5 oz. Amarillo 0.5 oz. Amarillo 1 oz. Amarill0 2 oz. Citra
Dry hop 0.5 oz. Cascade & Centennial 0.5 oz. Cascade & Centennial 0.5 oz. Cascade & Centennial 0.5 oz. Cascade & Centennial 0.5 oz. Cascade & Centennial 0.5 oz. Cascade, Centennial, & Simcoe 0.5 oz. Cascade, Centennial, & Amarillo 1.5 oz. Cascade; 0.5 oz. Centennial & Amarillo 2.5 oz. Cascade; 1.5 oz. Centennial; 1 oz. Amarillo 2 oz. Cascade; 1 oz. Centennial; 1 oz. Citra
OG 1.059 1.064 1.056 1.052 1.056 1.066 1.073 1.066 1.066 1.064
FG 1.008 1.010 1.008 1.010 1.008 1.010 1.010 1.010 1.011 1.010
ABV 6.7% 7.1% 6.3% 5.5% 6.3% 7.4% 8.3% 7.4% 7.2% 7.1%
Posted in Brewing, Competition, Red IPA | Comments Off on Iteration 10 & Competition Results

Tasting Iterations 8 & 9

This post is one in a series of making small adjustments to a single recipe in order to improve it, learn more about the impact each ingredient has on the finished product, and the art of recipe creation. The rest of the comparison tastings in this series can be found here.


Since beginning to compare and taste these beers blind, I’ve been glad to see that I’ve been correct about which beer is which every time. I had previously thought that each change, however seemingly small, had enough impact on the final product that it would be no problem telling these red IPAs apart, and that has proven to be true. What has been pleasantly surprising, though, has been the fact that my tasting notes align pretty well with other tasting notes I’ve taken when I was not blind to the beer I was drinking. While a single data point can’t confirm something entirely, it does provide some more support to my perception of these beers prior to these blind tastings (at least for Iterations 6-9).

Recap

The recipes for each beer are as follows:

Iteration 8

  • Mashed at 150⁰ F for 1.25 hrs.
    • 10 lbs. 2-Row
    • 1.2 lbs. Crystal 120
    • 1 lb. Vienna
  • Boiled for 1 hr.
    • 0.5 oz. Magnum (60 min) at 14.7%  AA
    • 0.5 oz. Magnum (30 min) at 14.7%  AA
    • 0.5 oz. Cascade (10 min) at 5% AA
    • 0.5 oz. Centennial (5 min) at 9.7% AA
    • 0.5 oz. Amarillo (hop stand) at 12.9% AA
  • Pitched US-O5
  • OG: 1.066
  • FG: 1.010
  • ABV: 7.35%
  • Dry hopped 1.5 oz. Cascade, 0.5 oz. Centennial, and 0.5 oz. Amarillo for 5 days.
  • Bottled and primed with 4 oz. of priming sugar.
Iteration 9

  • Mashed at 150⁰ F for 1 hr.
    • 10 lbs. 2-Row
    • 1.2 lbs. Crystal 120
    • 1 lb. Vienna
  • Boiled for 1 hr.
    • 0.5 oz. Magnum (60 min) at 14.7%  AA
    • 0.5 oz. Magnum (30 min) at 14.7%  AA
    • 0.5 oz. Cascade (10 min) at 5% AA
    • 0.5 oz. Centennial (5 min) at 9.7% AA
    • 0.5 oz. Amarillo (0 min) at 7.8% AA
    • 0.5 oz. Amarillo (hop stand at 180⁰ F) at 7.8% AA
  • Pitched US-O5
  • OG: 1.066
  • FG: 1.011
  • ABV: 7.2%
  • Dry hopped 2.5 oz. Cascade, 1.5 oz. Centennial, and 1 oz. Amarillo for 4 days.
  • Bottled and primed with 4 oz. of priming sugar.

Appearance

Iteration 8 poured with a moderate head that lingered for a while but didn’t take long to drop to a thin white foam. It was red, and was relatively clear—something that surprises me since I had previously watched all of my beers in this series fall victim to chill haze. This beer was no different in previous tastings, but for some reason this particular beer was clear directly from the fridge.

Iteration 9 poured with a respectable head that had excellent retention. This beer was dark red, possibly caused by extra haziness due to the much heavier dry hopping in this version.

8&amp;9

Aroma

Iteration 8 had an aroma of Bing cherry, black plum, grapefruit, and a hint of pear.

Iteration 9 smelled strongly of orange rind (the white portion inside the peel—not the peel or zest) and orange flesh. Behind those flavors were notes of Bing cherry and black plum, which were also prevalent, but less so than the orange aromas.

Flavor

Iteration 8 had a strong and rich dark fruit flavor composed of plum and black cherry. Other flavors were secondary to those dark fruit notes, but this beer also had tasted of citrus, a slight herbal flavor, a hint of a floral note, and apricot.

Iteration 9 had some grassiness to it. Looking beyond that flavor, though, yielded rich black cherry and black plum flavors with a taste of orange flesh mixed in.

Final Thoughts

These beers were both good. While the hop flavor of Iteration 8 was starting to drop off, it was still present and the malt character had grown deep and rich. This is something I’ve noticed across other Iterations of this beer, and perhaps it’s the nature of a red IPA. The malt depth takes time to mature, but by the time it has reached its peak the hop aroma and flavor is fading. This makes it difficult to decide when this beer is truly at its best, since both elements make this beer what it is.

All that said, at the time of this tasting I had a slight preference for Iteration 9 if I looked past the grassy off-flavor and considered the other pieces of the beer. With the grassiness there, though, I enjoyed Iteration 8 a bit more. I suppose that means that I enjoyed the idea of Iteration 9—what it could have been if I’d dry hopped for less time or hadn’t used potentially old hops—more so than the beer itself.

Posted in Comparing, Red IPA | Comments Off on Tasting Iterations 8 & 9

Tasting Iterations 7 & 9

This post is one in a series of making small adjustments to a single recipe in order to improve it, learn more about the impact each ingredient has on the finished product, and the art of recipe creation. The rest of the comparison tastings in this series can be found here.


As I did last time, I completed this side by side tasting of Iterations 7 and 9 of this red IPA blind to the beer I was drinking. After pouring each beer and taking my notes on the appearance of each, my wife handed me each beer so that I did not know ahead of time what was in front of me. After completing my tasting of each, I looked to see which beer was which and assigned the corresponding tasting notes to that beer. I will say that both times I’ve done this so far, I have been able to correctly (and easily) distinguish which beer is which during the blind tasting. Granted, I was not blind to which beers were in the mix, but the differences in these Iterations were enough for me to know that they were different beers by taste alone.

Another note with this tasting: as I’ve noted before, the cause of Iteration 7’s much higher OG and subsequently higher ABV is due to a volume error on my part.

Recap

The recipes for each beer are as follows:

Iteration 7

  • Mashed at 150⁰ F for 1.25 hrs.
    • 10 lbs. 2-Row
    • 1.2 lbs. Crystal 120
    • 1 lb. Vienna
  • Boiled for 1 hr.
    • 0.5 oz. Magnum (60 min) at 14.7%  AA
    • 0.5 oz. Magnum (30 min) at 14.7%  AA
    • 0.5 oz. Cascade (15 min) at 5% AA
    • 0.5 oz. Centennial (5 min) at 9.7% AA
    • 0.5 oz. Amarillo (0 min) at 12.9% AA
  • Pitched US-O5
  • OG: 1.073
  • FG: 1.010
  • ABV: 8.3%
  • Dry hopped 0.5 oz. Cascade, 0.5 oz. Centennial, and 0.5 oz. Amarillo for 5 days.
  • Bottled and primed with 4 oz. of priming sugar.
Iteration 9

  • Mashed at 150⁰ F for 1 hr.
    • 10 lbs. 2-Row
    • 1.2 lbs. Crystal 120
    • 1 lb. Vienna
  • Boiled for 1 hr.
    • 0.5 oz. Magnum (60 min) at 14.7%  AA
    • 0.5 oz. Magnum (30 min) at 14.7%  AA
    • 0.5 oz. Cascade (10 min) at 5% AA
    • 0.5 oz. Centennial (5 min) at 9.7% AA
    • 0.5 oz. Amarillo (0 min) at 7.8% AA
    • 0.5 oz. Amarillo (hop stand at 180⁰ F) at 7.8% AA
  • Pitched US-O5
  • OG: 1.066
  • FG: 1.011
  • ABV: 7.2%
  • Dry hopped 2.5 oz. Cascade, 1.5 oz. Centennial, and 1 oz. Amarillo for 4 days.
  • Bottled and primed with 4 oz. of priming sugar.

Appearance

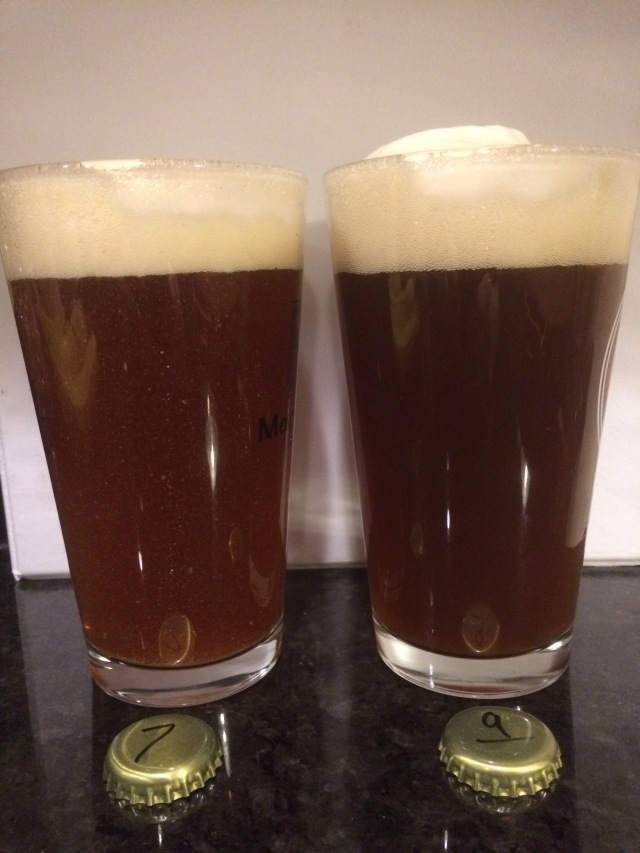
Both beers poured with a massive head and both had excellent retention, maintaining about a quarter of an inch of foam until the last sip. Iteration 7 was noticeably lighter in color than Iteration 9, which seemed odd to me as I remembered Iteration 7 being darker than others before it. It was a copper/amber hue, but when held to the light, the red showed up a bit more. Iteration 9, on the other hand, was definitely red held to the light or not.

7&amp;9

Aroma

Iteration 7 had an aroma of cherry, plum, pear, and orange zest. Iteration 9’s aroma was a little more distinct (I assume due to its relative freshness) and smelled of plum, Bing cherry, orange rind, and had a hint of berry in the nose as well—perhaps blackberry. Strangely enough, one note in the aroma reminded me of a fruit roll up, and not in a bad way.

Flavor

Iteration 7 tasted of black plum, Bing cherry, orange zest, and a hint of pear. Iteration 9, unfortunately, a bit tasted grassy. Aside from that off-flavor, there were also pleasant notes of cherry, plum, orange (flesh), and grapefruit.

Final Thoughts

The color difference is strange to me. It’s almost as if Iteration 7 has grown lighter with time, although I can’t verify that. I don’t trust the lighting in my pictures well enough to be able to state that as a fact, but I did note it as being “definitely red” in my original tasting notes. I’ve definitely seen beers grow darker over time due to oxidation, but I’m unfamiliar with anything that would cause a beer to become lighter over time. I wish I could firmly state that it has grown lighter, but I am basically working off of notes and memory—hardly objective evidence. At the same time, I feel pretty confident this beer is a lighter color than when I first drank it.

Another thing that surprised me was the grassiness in Iteration 9. The last time I tasted this beer, I got almost none of that grassy off-flavor and I thought it had aged out. It’s possible that this beer was slightly more carbonated than the last bottle of Iteration 9 I had and accentuated that flavor more to where it was noticeably present. Otherwise, I’m unsure why I wouldn’t have tasted it last time as well since it was a fairly strong flavor.

Posted in Comparing, Red IPA | Comments Off on Tasting Iterations 7 & 9