
This post is one in a series of making small adjustments to a single recipe in order to improve it, learn more about the impact each ingredient has on the finished product, and the art of recipe creation. The rest of the series can be found here.
Brew Day
There’s something refreshing about the first brew of the new year. The high for the day was in the 60s (yes, in January) and it was cool and overcast, which definitely helped create the atmosphere of an ideal brew day. The fact that I took the time to create a checklist for myself prior to this brew day also helped things feel a little smoother. I usually have this leering sensation hanging over me that I’m forgetting something, and the effort it took to think through my process ahead of time was minimal. I’ll reproduce my checklist below for anyone interested in my process or borrowing my efforts.
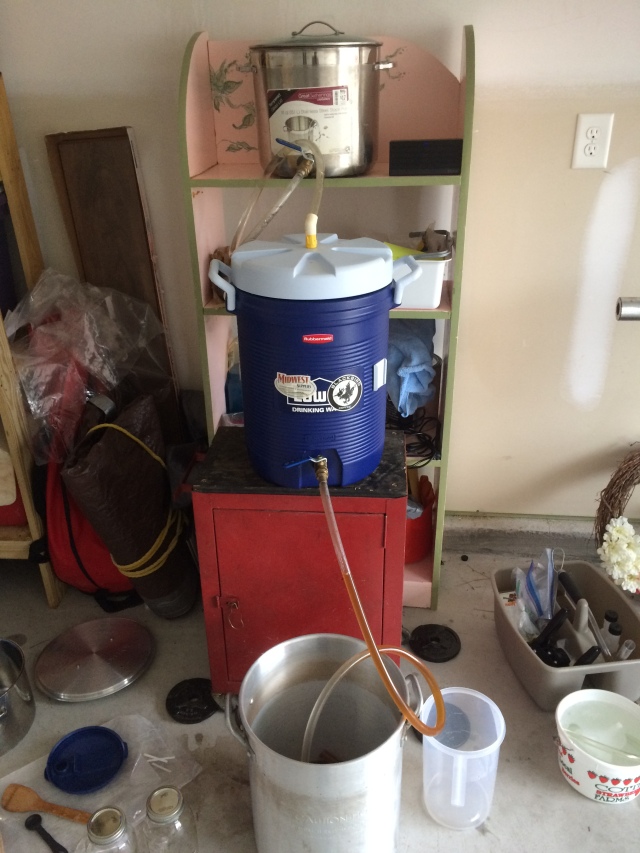
Another thing that I’ve been doing to help the day run smoothly is to gather everything the night before, including gathering my water and mixing up a batch of Star San. Things like this helped me get the flame under my strike water by 8:30, coffee in hand.
Although things felt like they went smoothly, it didn’t take long for the first mistake of the day to show up. I miscalculated my strike temperature and landed a little low with my mash temperature at 148⁰F. As I was shooting for 152⁰F, I quickly boiled some water and mixed it in my mash. Unfortunately, this only rose my mash temp to 150⁰F, and since that took up the rest of the headspace in my mash tun, that’s where it was going to have to stay.
Over the course of 1.25 hours, I opened up the mash tun and gave it a stir every 15 minutes. This was the first time I’d stirred my mash, and while I didn’t think it would matter, I tried it anyway and was pleasantly surprised to see an increase of 5% in my brewhouse efficiency (up to 73% from the usual 67%). This meant that I was closer to my targeted OG, though I still missed it by four points.
I also attempted to measure the pH of my mash since I was concerned it might be a little too high for a beer of this color. I dipped in the pH strips I had bought (specifically with a small range of 4.7-6.2). The strip had a pale yellow testing element at the end, and after I dipped it in my mash, it was only a slightly darker yellow, mostly from being wet. Quickly comparing this color to the included reference guide, the strip indicated a pH of 4.7. Vastly confused and a little concerned for my brew’s well-being, I tried again and got the same result. Then I tried our tap water, which I knew to be 6.8 from a recent water report. Same color. I consulted with my wife, who actually remembers things from her high school science classes, asking what liquids we had around the house that were very basic. Dish soap, apparently. Dipping the next test strip in some soapy water, I got the same reaction—or rather, no reaction. This bad batch of test strips was a bummer, but at least my mash pH wasn’t too low (probably).
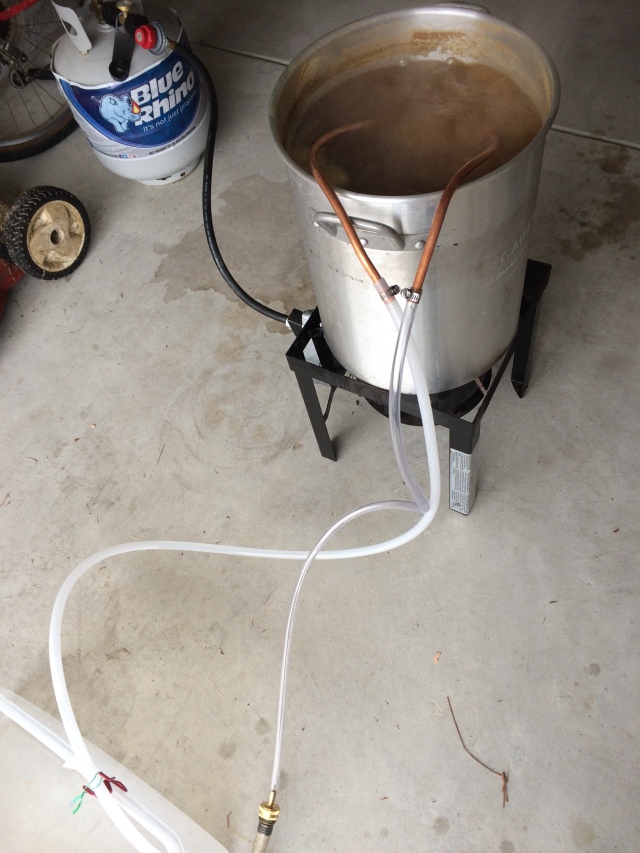
A big plus of the day was that I got to use the new immersion chiller I built for the first time, and that went without issue. It worked beautifully, and I already don’t know how I lived with using ice baths for so many years.
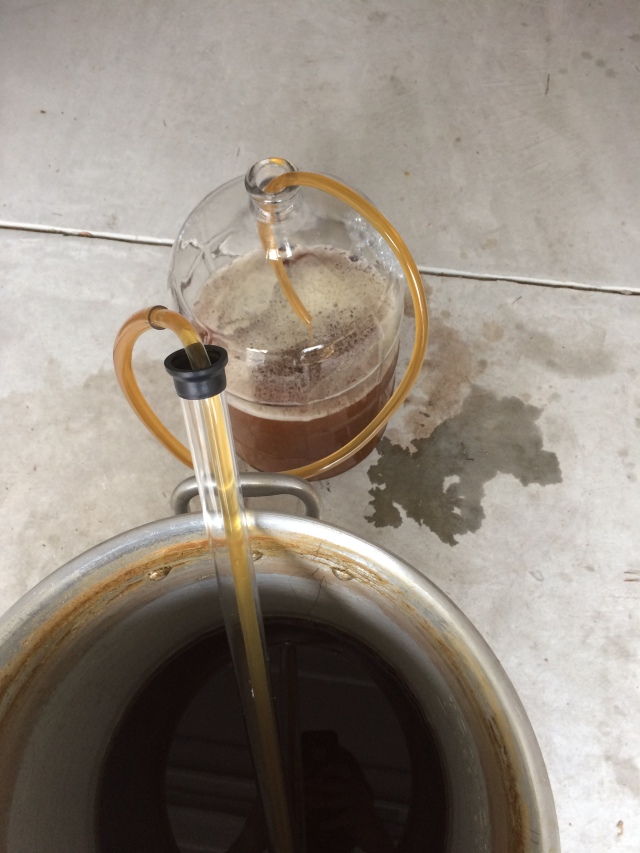
A couple hours later, when my wort had settled into fermentation temperature, I pitched my yeast, and it was bubbling happily within a few hours.
Recipe
The recipe I used for this brew day was the original. Since I’m trying to replicate the first time I made this recipe, I plan on using this as a baseline for my adjustments.
- Mashed at 150⁰ F for 1.25 hrs.
- 10.25 lbs. 2-Row
- 1 lb. Crystal 80
- Sparged at 170⁰ F
- Boiled for 1 hr.
- 0.5 oz. Simcoe (60 min) at 12.2% AA
- 0.5 oz. Simcoe (30 min) at 12.2% AA
- 0.5 oz. Cascade (15 min) at 5.0% AA
- 0.5 oz. Centennial (5 min) at 9.7% AA
- Pitched US-O5
- OG: 1.059
- FG: 1.008
- ABV: 6.69%
- After 8 days, dry hopped 0.5 oz. Cascade and 0.5 oz. Centennial for 5 days.
- Bottled and primed with 4 oz. of priming sugar.
Tasting
All in all, this beer is not quite what I remember it to be—which was honestly expected. I think part of that is due to my changing palate, additional experience as a homebrewer, and therefore my higher standards for what I produce and consider “good.” The aroma is not as present as I’d like, but there are some floral notes to it, as well as a bit of “green hop” aroma, which might be due to how young this beer is at the time of tasting.
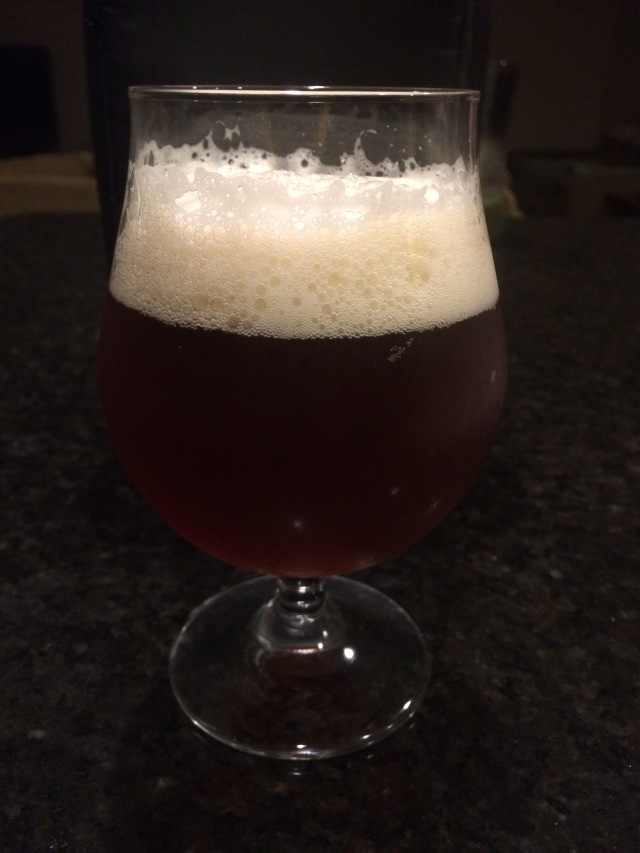
Although the hop aroma isn’t where I’d like it to be, the potential is there. There is certainly some citrus in the flavor, especially as the beer warms—more of what I was hoping for.
I was hoping for rich, dark fruit flavors from the malt, but this falls short to say the least. While there are some dark cherry and plum flavors, there is not nearly as much as I want. This iteration is more pale ale than red ale in terms of the malt. However, the malt backbone of this beer balances the hops pretty closely to how I’d like it balanced in its final version. At an estimated 55 IBUs, this beer is pretty close to a 1:1 BU:GU ratio. Yet, somehow the malt is coming through well enough to balance the bitterness and not let it be overwhelming.
Goals for the Next Brew
Something I realized as I was bottling this beer is that for a red ale, it wasn’t very red. In fact, it wasn’t red at all. It was orange. Revisiting my recipe using an online calculator, it turns out that my estimated SRM for this beer was 12. I would like to land somewhere around 16 next time, hopefully yielding a redder hue. Obviously, the color isn’t as important to me as the flavor, but if “red” is in the name, the beer should be red.
While I want to adjust my hop profile to be more prominent in both aroma and flavor, I’m going to focus on getting the malt right first. Not only do I want more of the dark fruit flavors that were minimally present in this beer, but I want them to be richer. Based on the flavor of this beer, it seems to me that even increasing the amount of crystal 80 in this recipe would not yield quite the depth of flavor that I’m shooting for. The questions I’m left with for next time are:
- What grain do I replace the C80 with?
- Regarding the grain I replace it with, should I increase the percentage in the grist?
- Should I not replace the C80 and simply add to it?
- If I add to it, do I keep the same percentage of C80 or do I lower it?
The Checklist
| Day Prior | Brew Day | ||
| Clear space in garage | Heat strike water | ||
| Gather: | Sanitize: | ||
| Towels | Airlock | ||
| Rags for cleaning | Siphon | ||
| Blankets (for swamp cooler) | Tubing | ||
| Mash paddle | Hydrometer | ||
| Thermometer | Flip carboy to drip dry | ||
| Trivet (for HLT) | Dough in | ||
| Oven mitts | Stir mash every 15 min. | ||
| Lighter | Put HLT on burner 15 min. before lauter | ||
| 10 gal. water | Vorlauf | ||
| Propane tank | Sparge | ||
| Storage tub (used as swamp cooler) | Gather 5 gal. and start burner | ||
| Hose | Gather additional wort to add to kettle | ||
| Measuring spoon (tsp) | Boil as recipe calls | ||
| Wash: | Hook up immersion chiller | ||
| Immersion chiller | Insert chiller 10 min. prior to end of boil | ||
| Boil Kettle | Chill wort | ||
| Mash tun | Transfer to carboy | ||
| HLT | Stabilize temperature in swamp cooler | ||
| Tubing | Pitch yeast | ||
| Sanitize carboy |